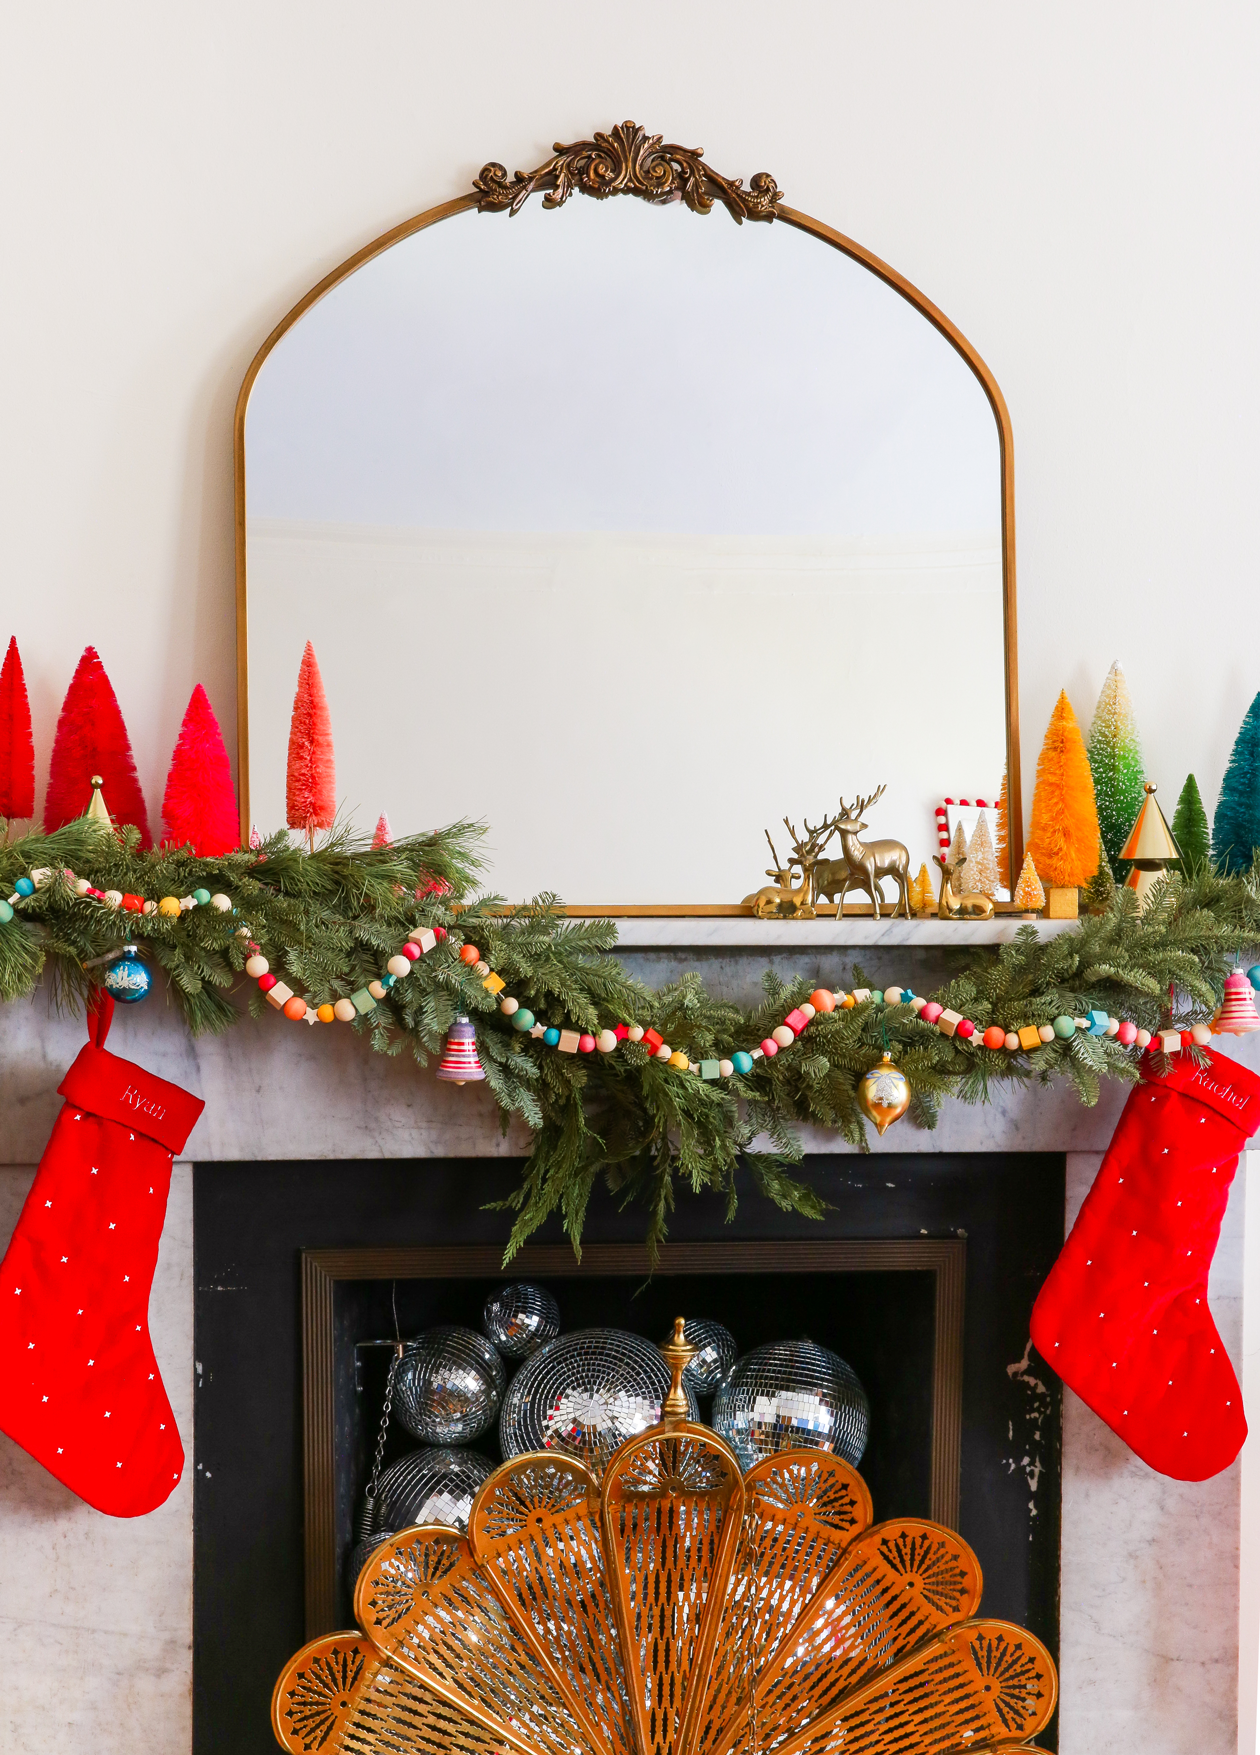
 I am beyond excited to share today’s project with you because it’s STILL making me smile! If you’re looking for a fun Christmas craft that will help add color to your decor, than look no further than this. Trust me, this is the one. Plus you can use it after the holidays are over! What’s not to love about a multi-purpose craft?! I can go on and on about how great this is, but instead I’ll just show you. Here’s how to make a colorful wooden bead garland:
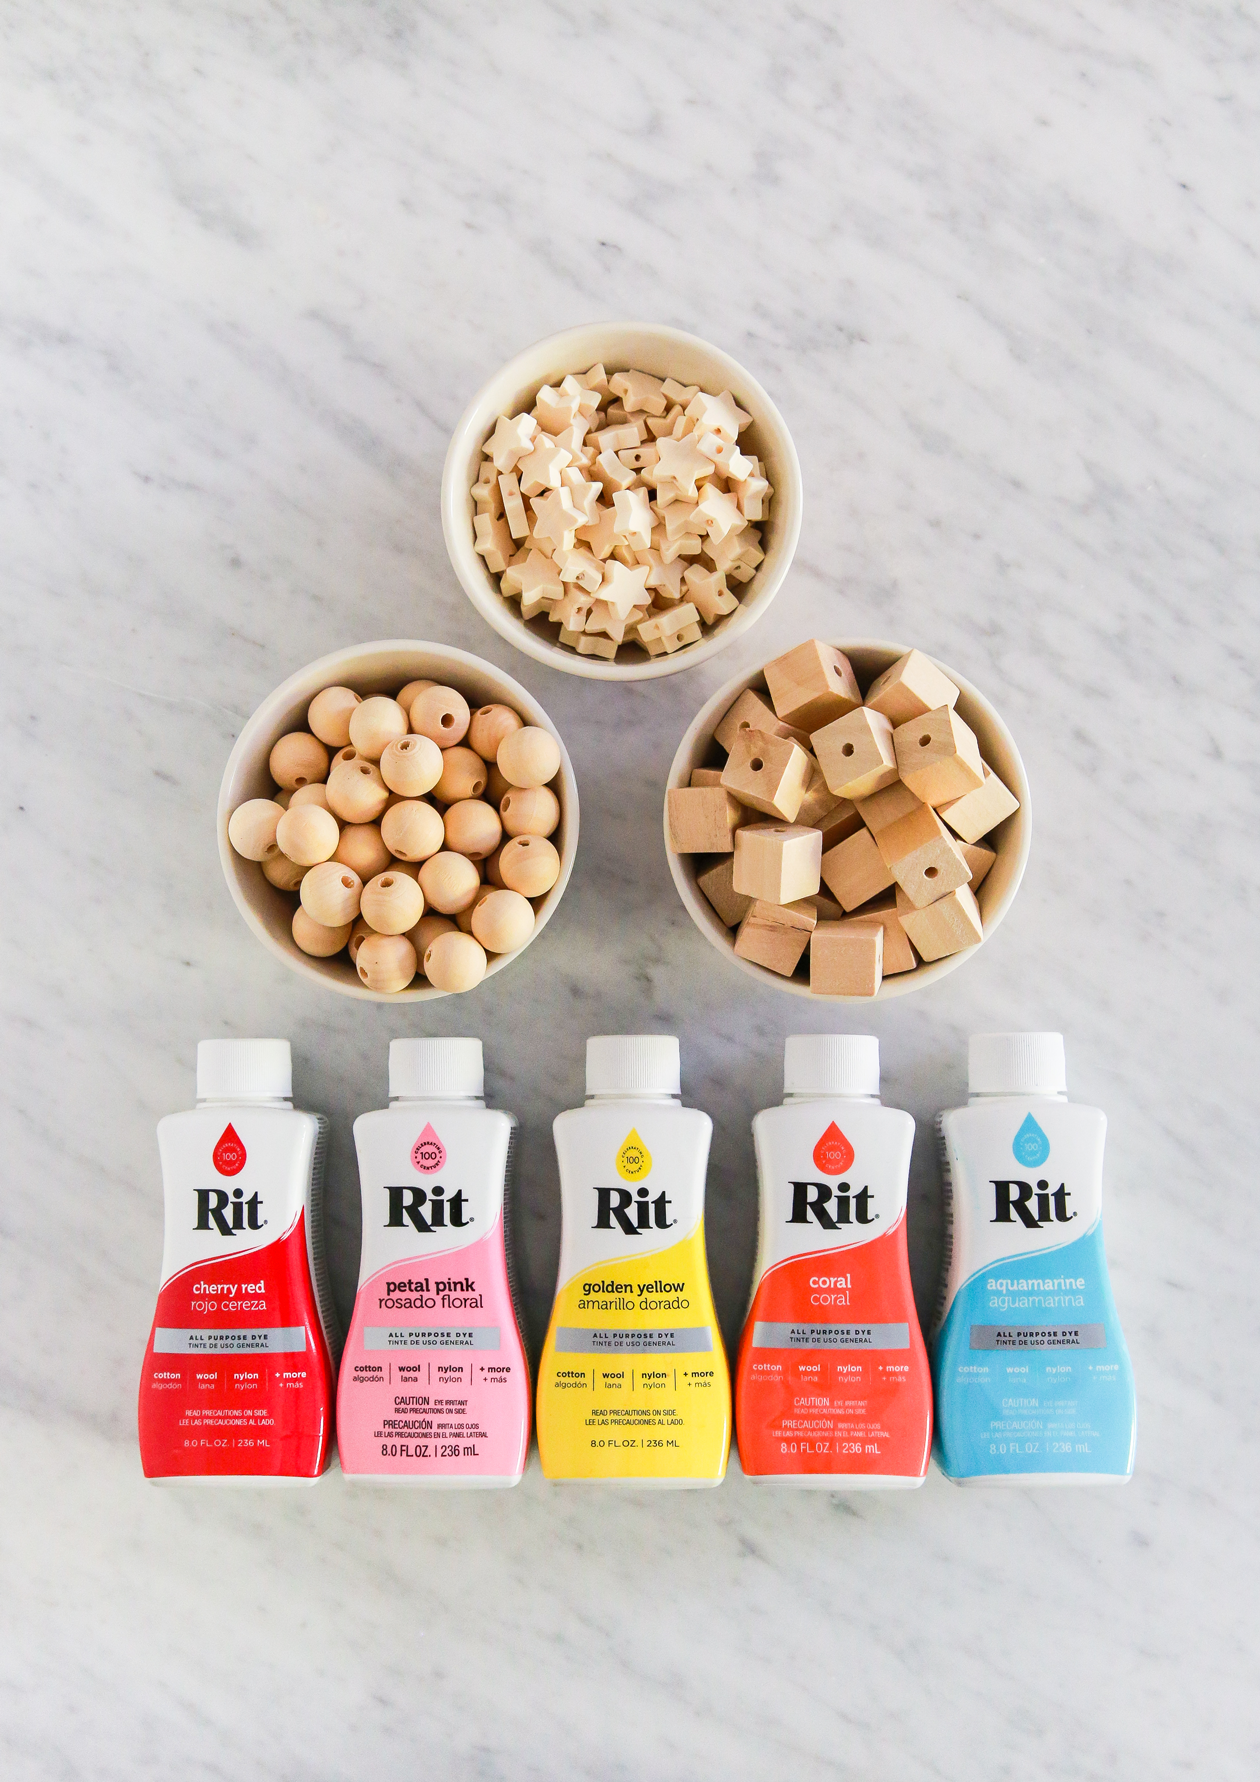 What You’ll Need
This post contains affiliate links
– Round beads (these work too)
– Square beads
– Star beads
– Liquid dye
– Mason jar with lid
– Baker’s twine
– Needle (a larger eye is handy!)
You can view all my Christmas Craft supplies over on Amazon as well!
Please feel free to keep reading for all the tips and how-to, but you can also video this project as my latest YouTube video! I hope that having a mix of photos and videos is helpful. I know as a visual person, I need all the help I can get!
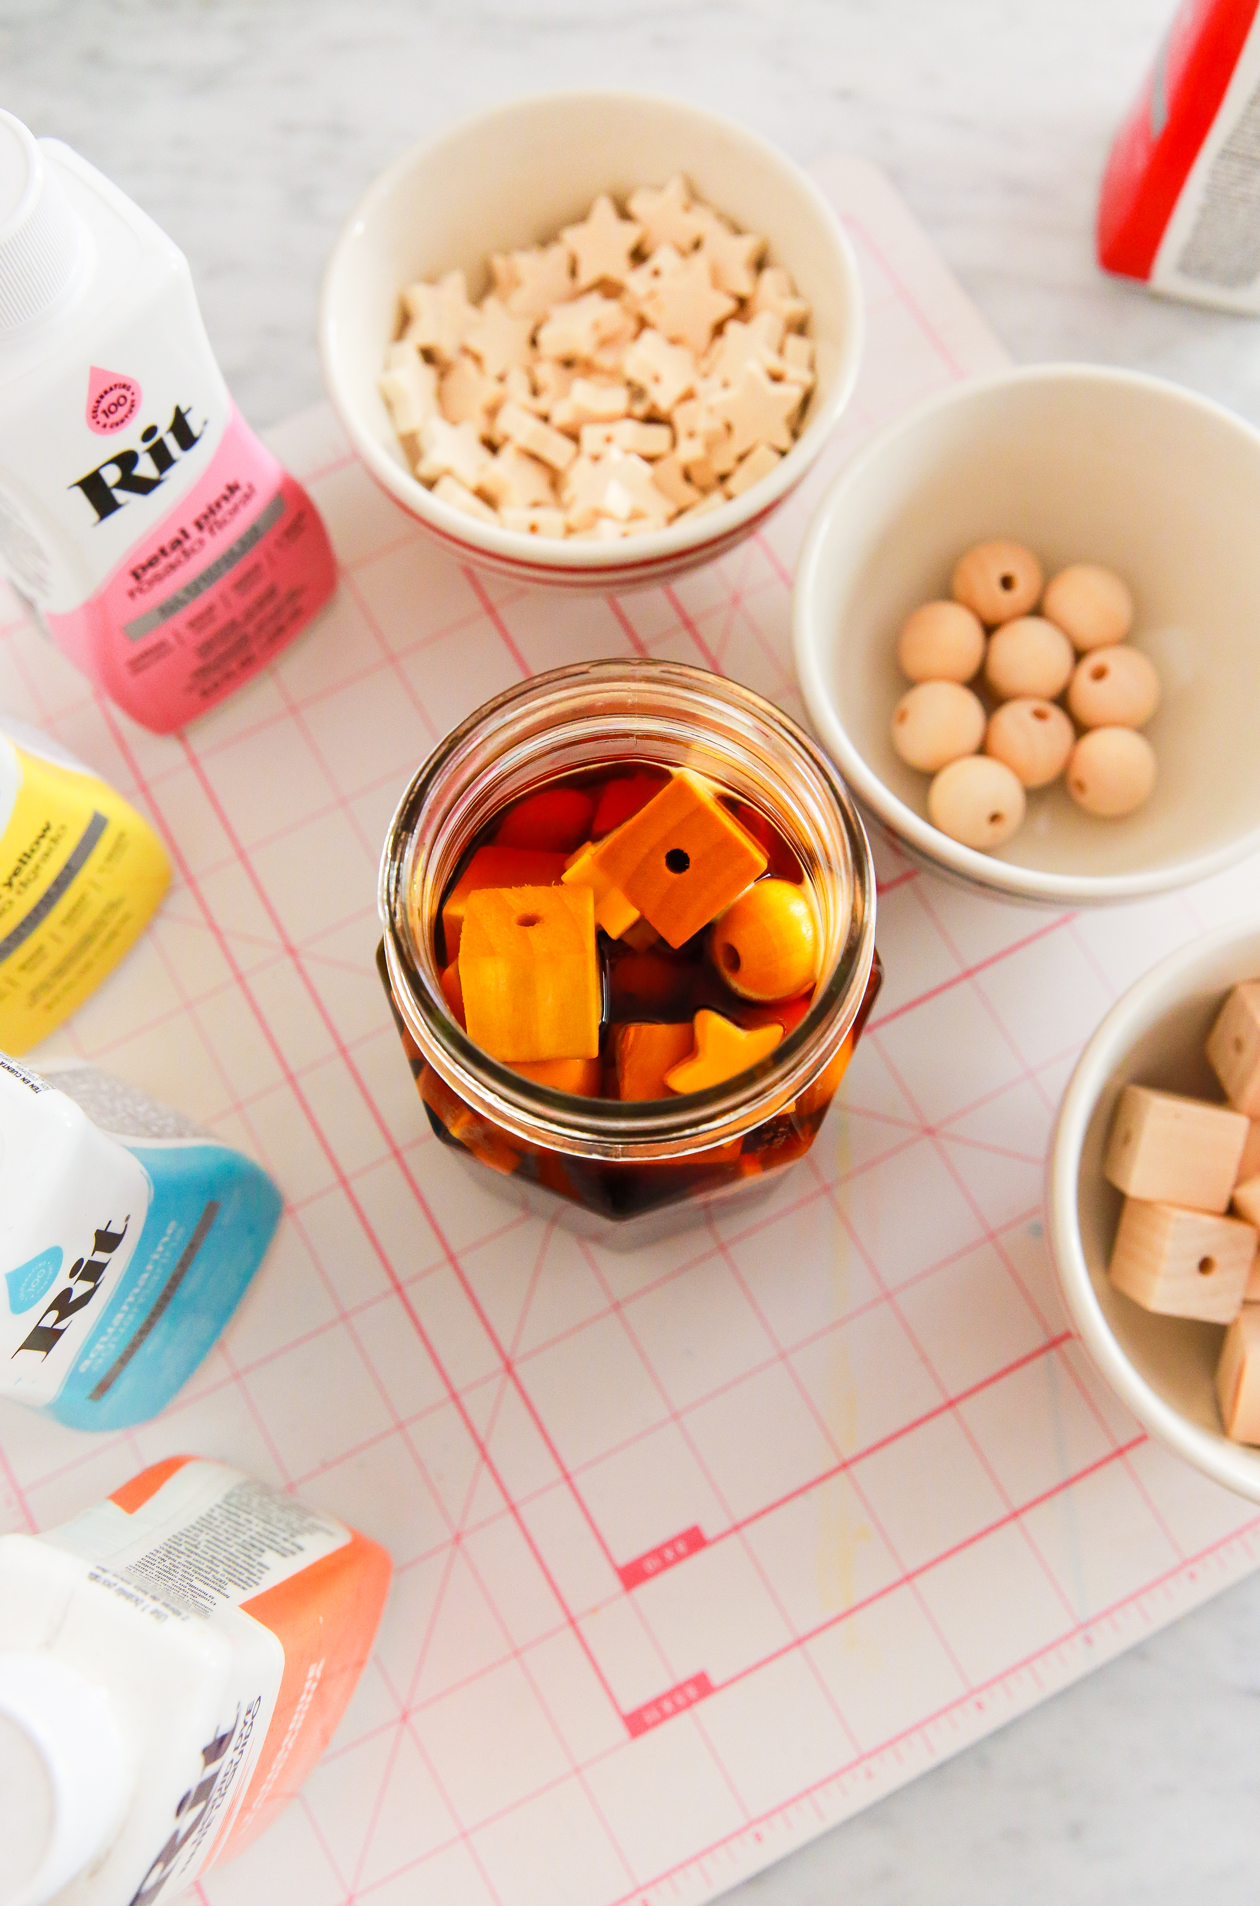 How to Dye Beads
I’ve shared how to dye wooden beads in the past, but here’s an updated method that I really enjoy:
1. Grab a mason jar with a lid. This will allow you to shake the jar instead of stirring the beads as they dye.
2. Fill the jar about 3/4 full with warm water and add your dye. The more intense you want the color, the more dye you need. You don’t really need to use more than a few tablespoons.
3. Let sit until you’ve gotten the color you want (about 10-15 minutes or so); shake the jar occasionally to stir.
4. Rinse in cold water until the water runs clear. Lay on a towel and let dry overnight.
 Additional Dye Tips
1. To make the most use out of your dye, instead of dumping the jar, use a spoon to remove the beads from the dye. That way you can add more beads to the jar and keep using the dye.
2. I’ve found that the beads took shades of orange and red a lot faster and easier than blues. You’ll be able to use less dye of the warm colors.
3. If you fill your jar too full with water, you won’t be able to add that many beads. 3/4 or less is perfec
4. Move the jar around to check the bead color. They will dry a bit lighter after you rinse them.
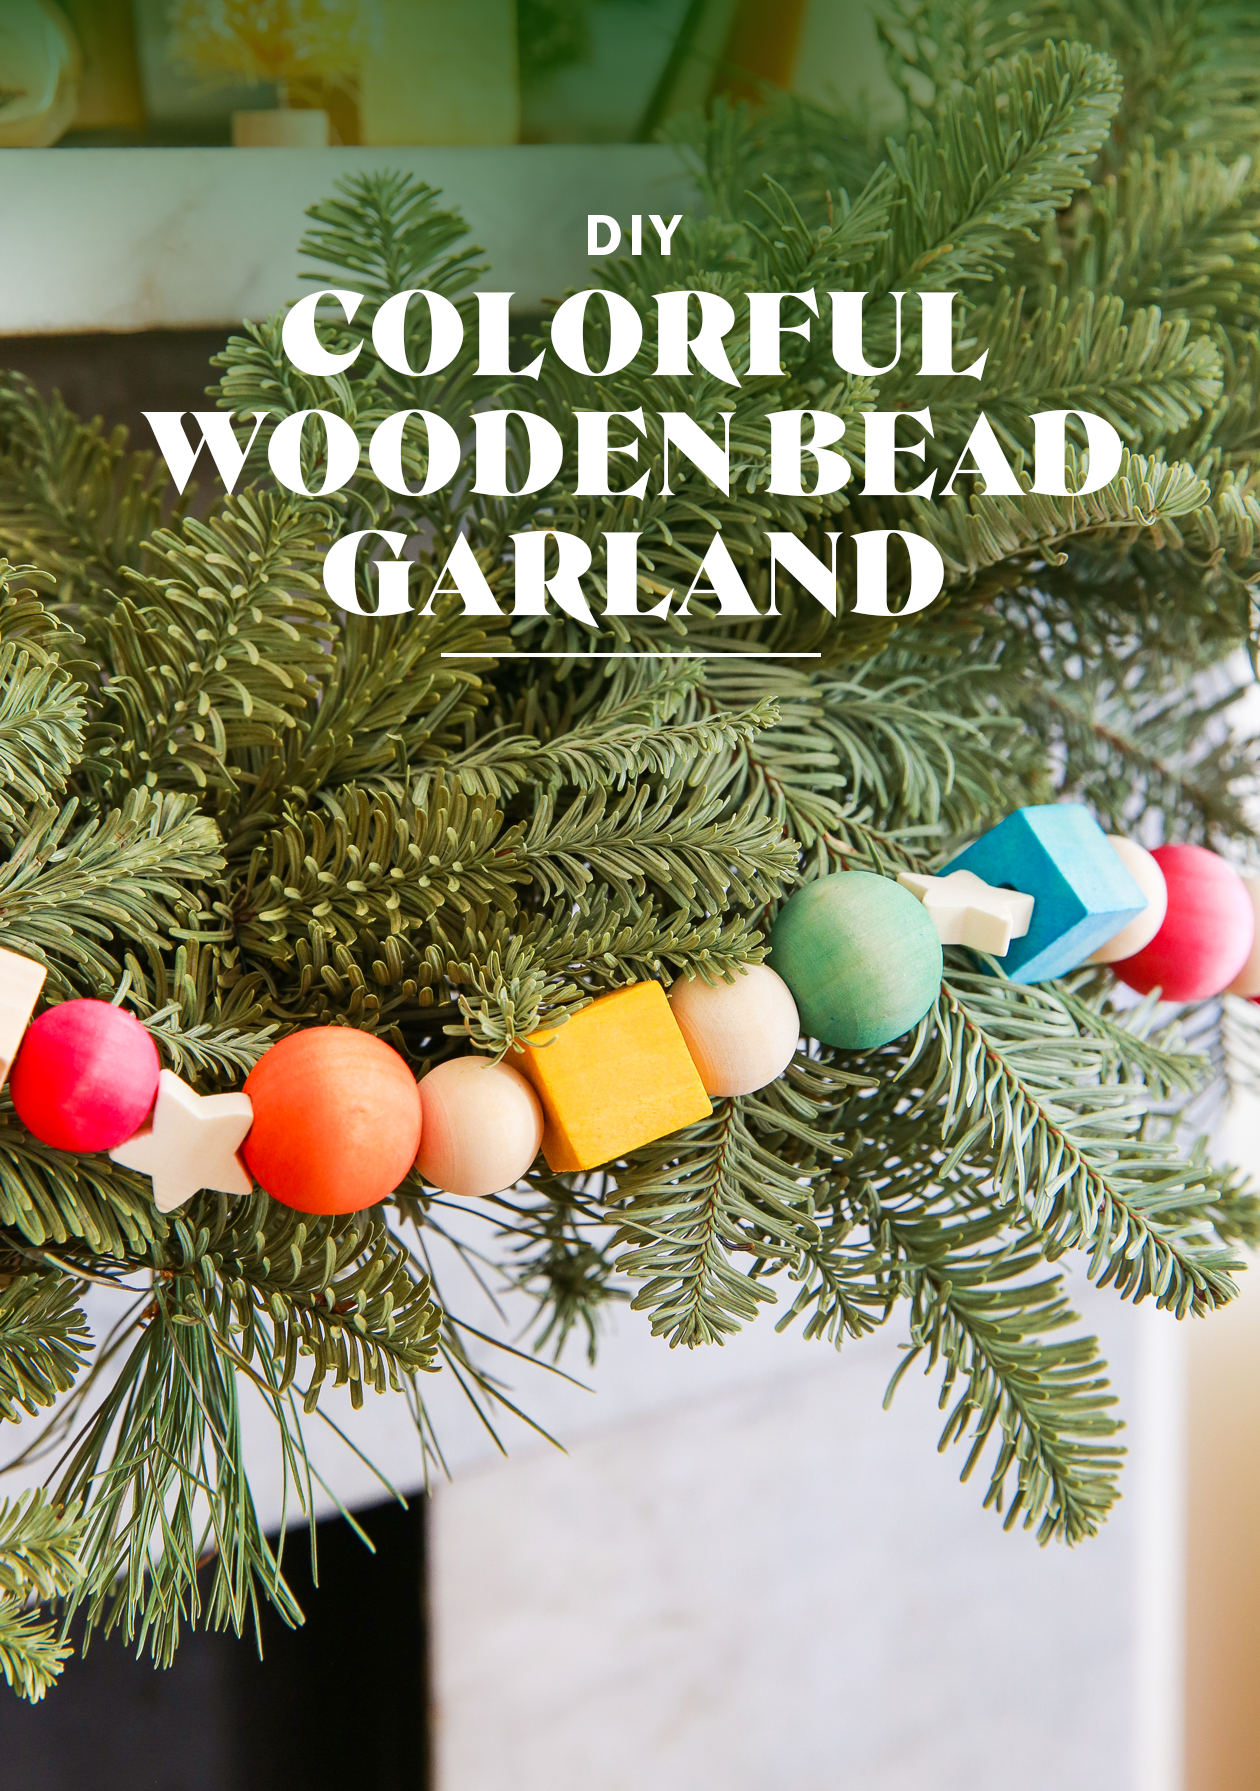
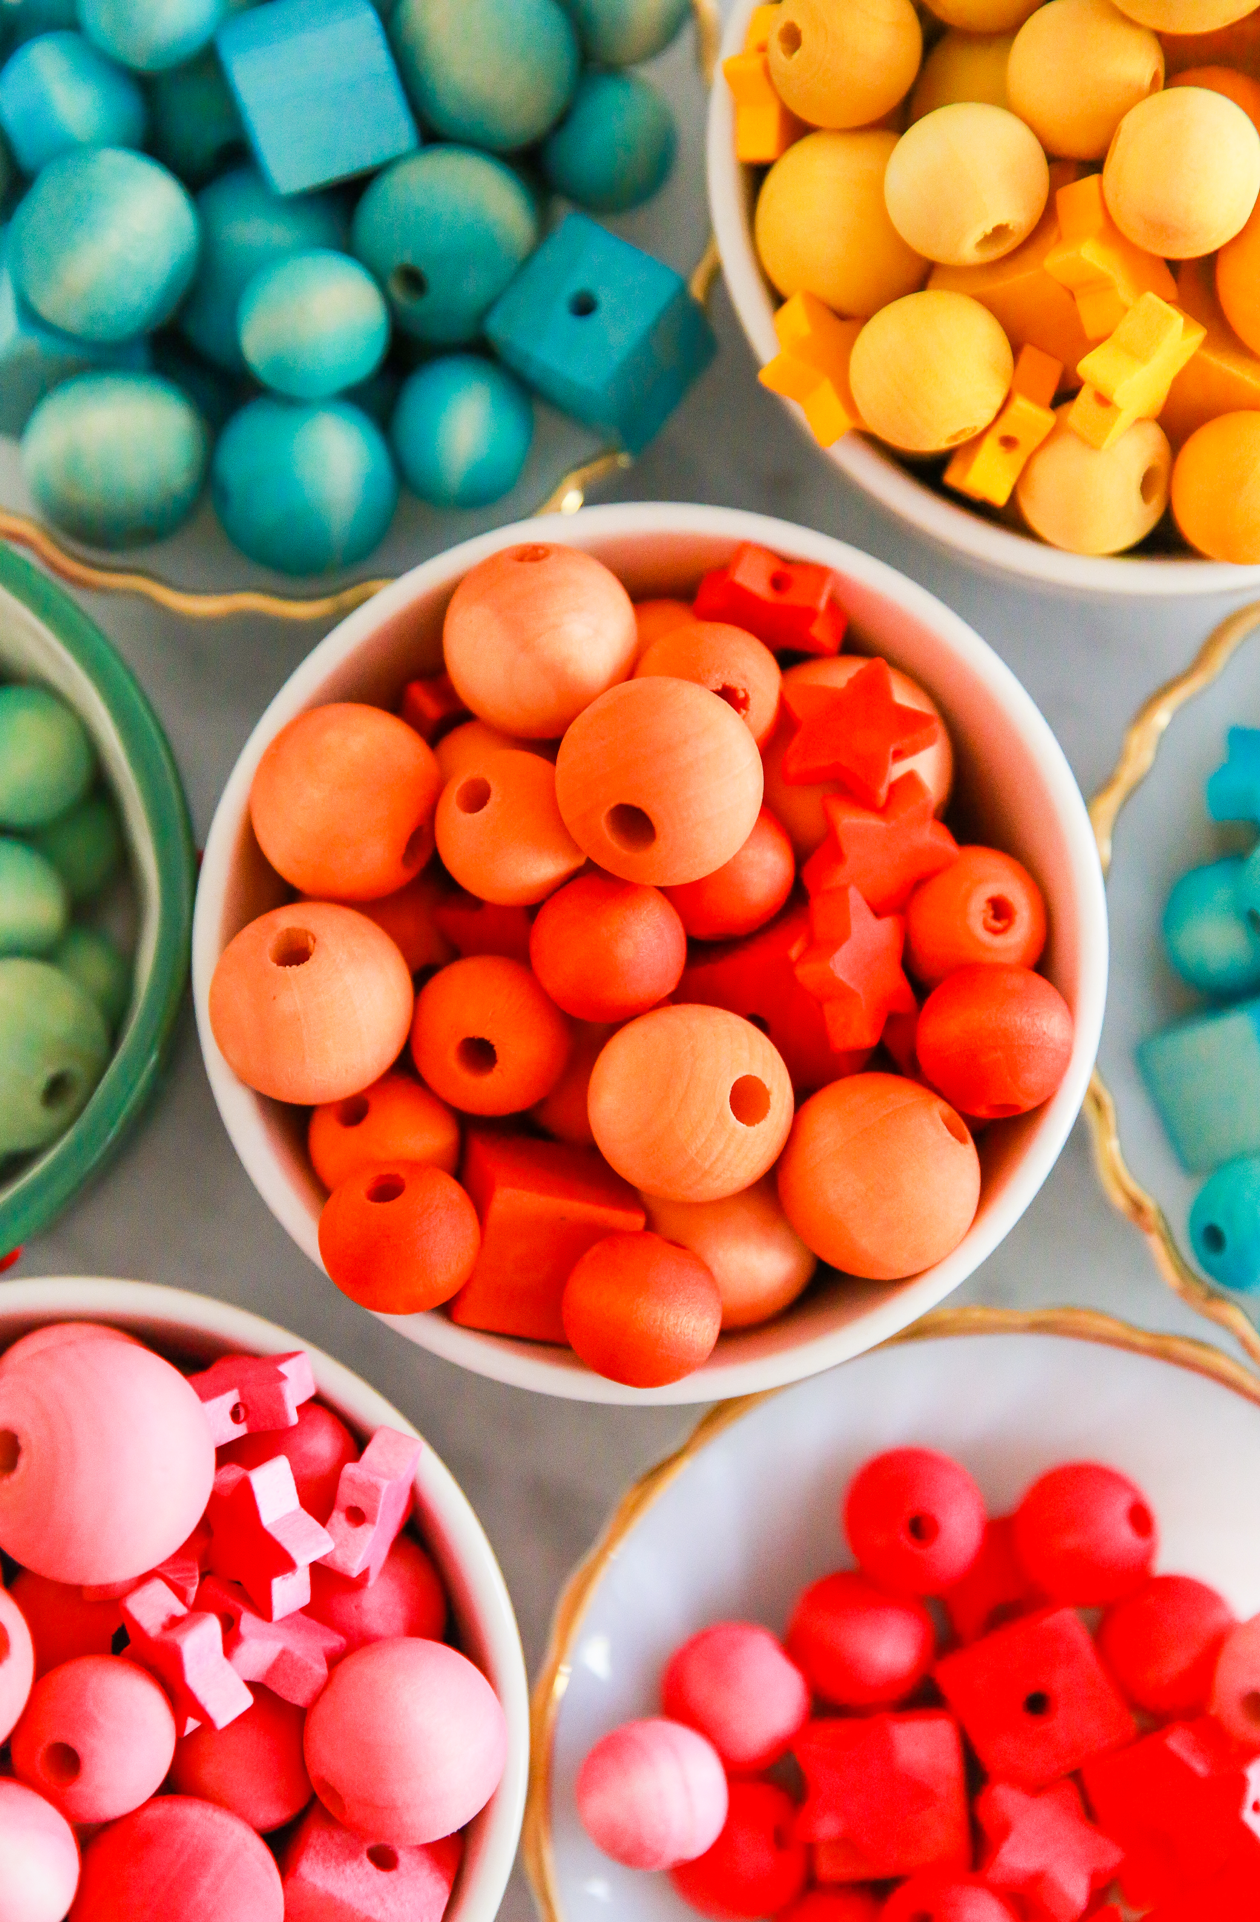
 How to Make The Garland
Once your beads are dry, place them in bowls so you have a better sense of how much of each color you have. Thread a needle with baker’s twine. You can use other durable twine, just make sure that it’ll pass through the bead holes with ease.
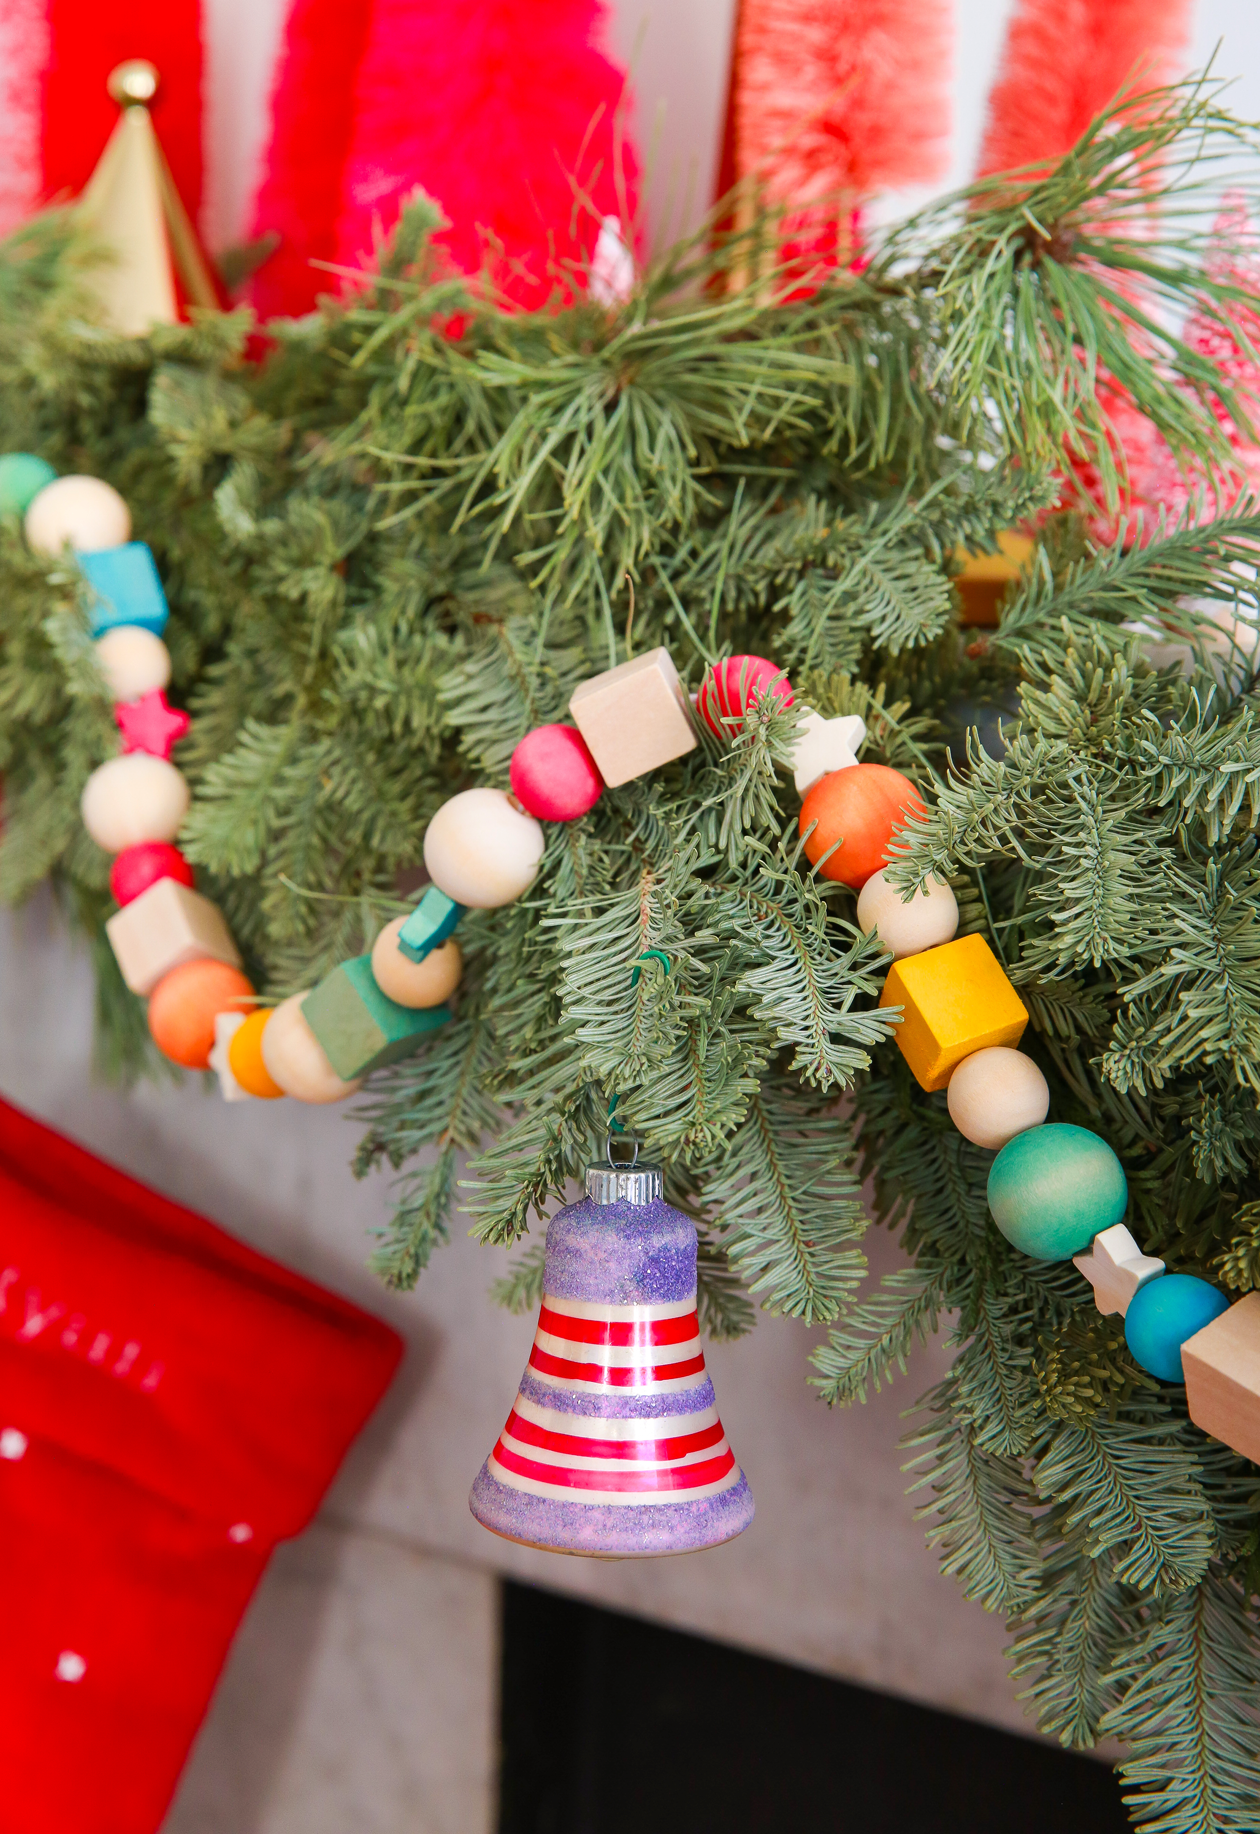
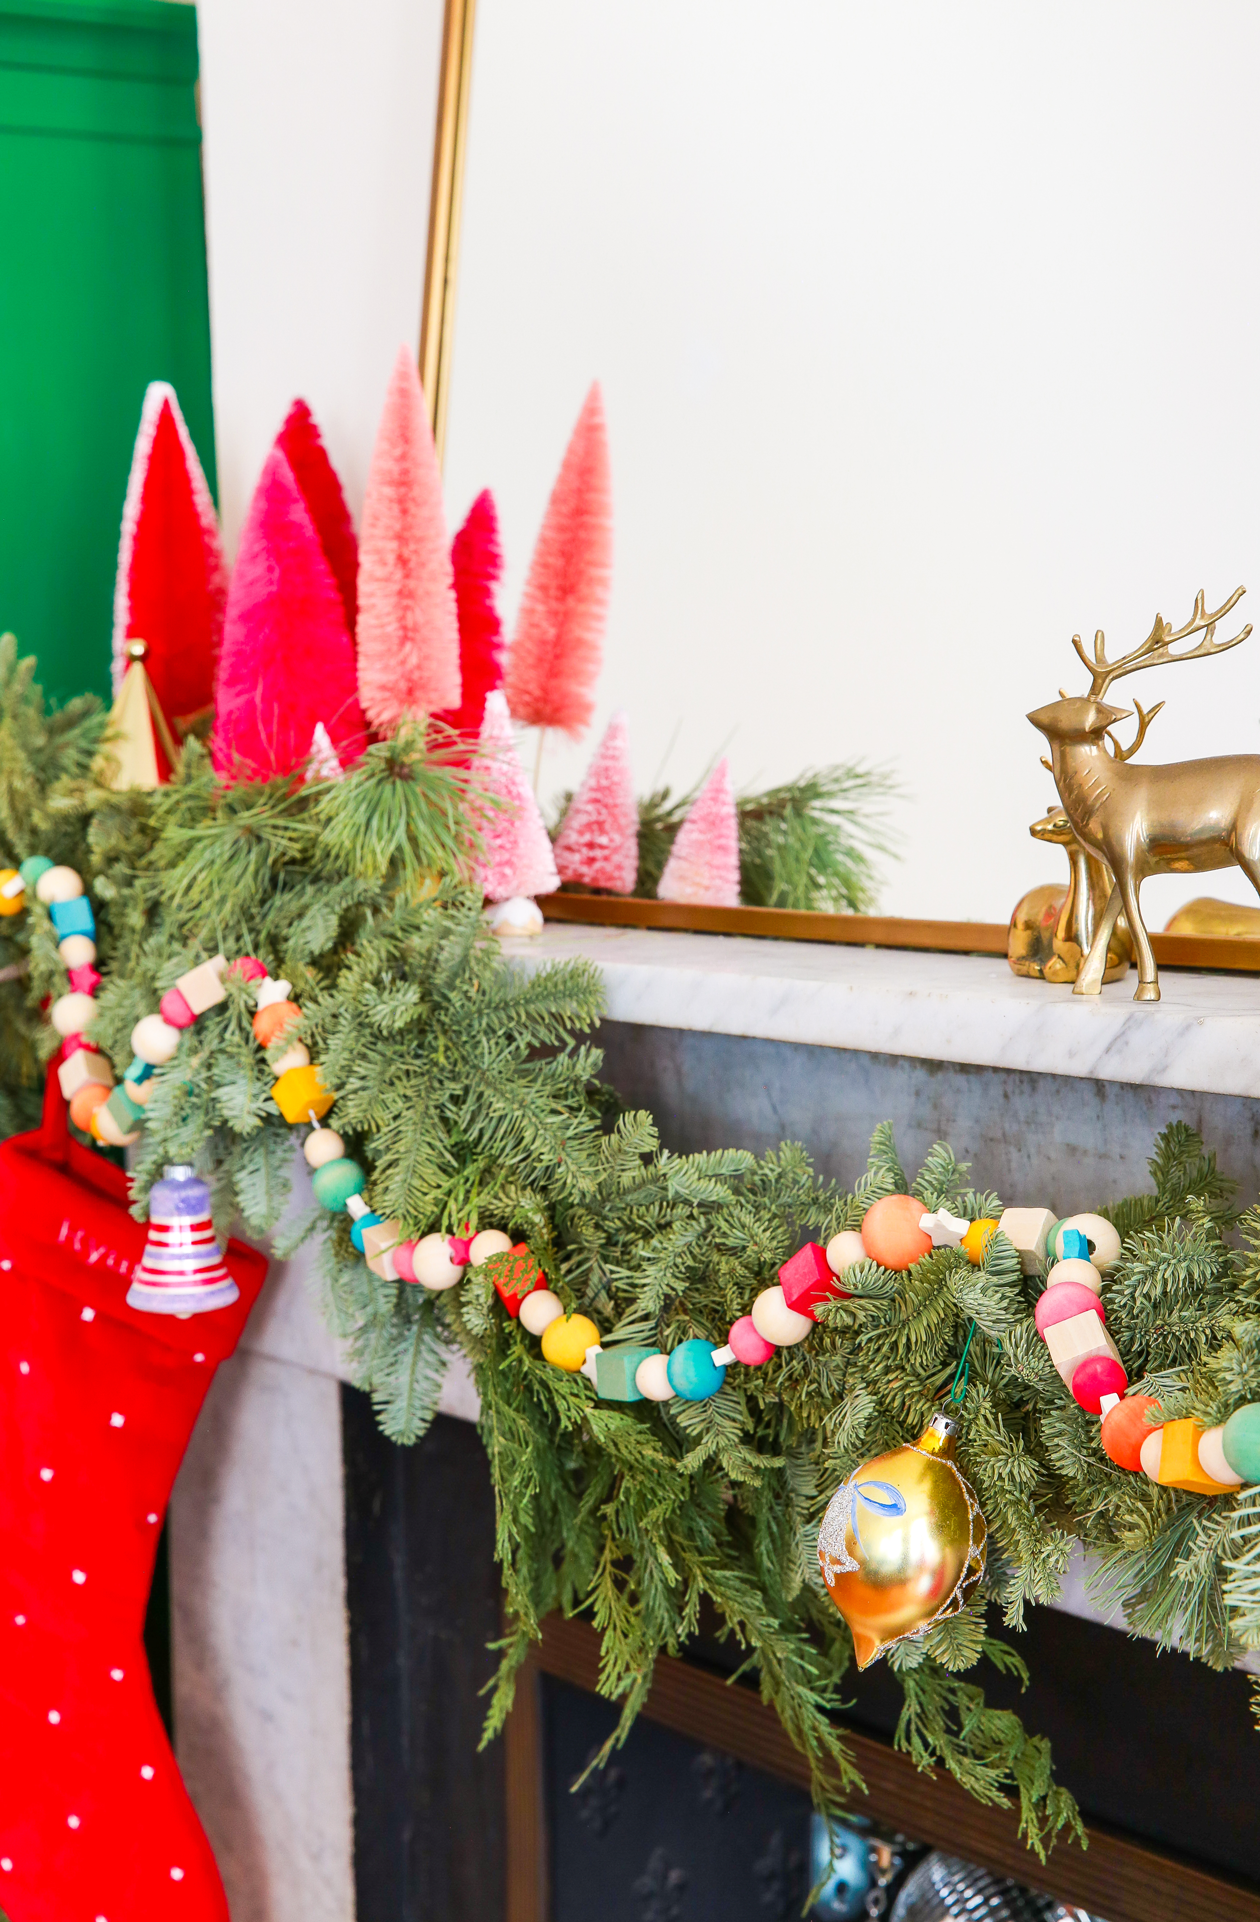
Add your beads! I went with a rainbow, but also added non-dyed beads to the mix to add a bit of variety. Continue adding your beads until you have your desired length. Trim and triple knot the ends. Make that knot extra strong so the beads won’t fall off the garland.
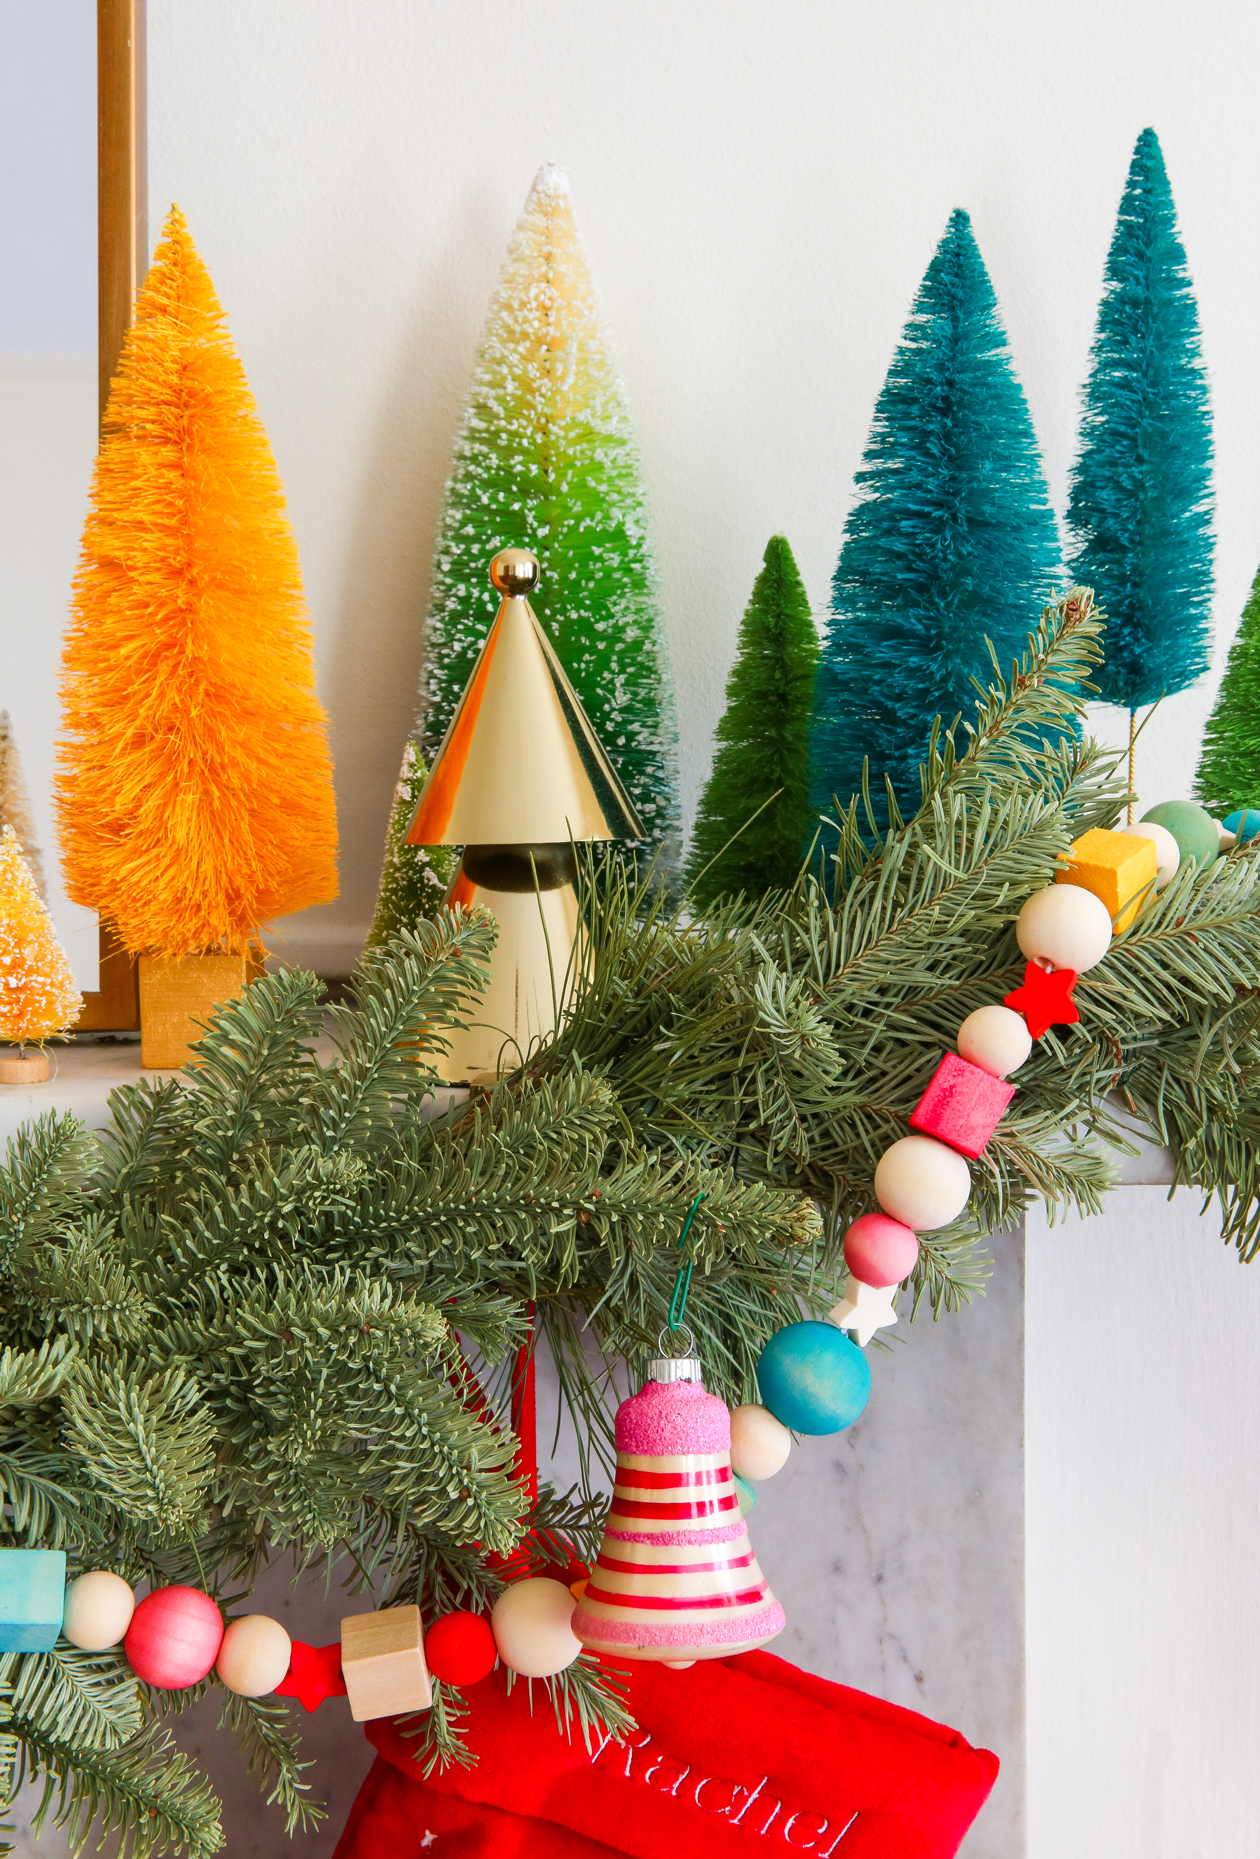
Hang and enjoy!
 So that’s the project! I really am so happy with how it turned out and even might say… this is one of my favorite holiday projects of all time. I had so much fun sipping on peppermint hot chocolate while stringing up beads! It just feels so special and definitely got me excited about it being the holidays.
Even if a rainbow Christmas isn’t your thing, the great part of this project is that you can totally customize this to your own decor. You can use any colors that you want, just be sure to test them as you work. Plus, when all the holiday decor is packed away, you can find a place to display this colorful wooden bead garland for the rest of the year.
Can’t wait to see how yours turns out! Let me know if you have any questions!