This post is sponsored by Montana Gold. All opinions expressed are my own. Thank you for supporting the brands that keep The Crafted Life Making!
 It’s a spray paint project kind of week around here! Now is definitely a good time to get outside and do some crafting before the weather completely changes. It may be fall, but that doesn’t mean you can’t still add color to just about everything!
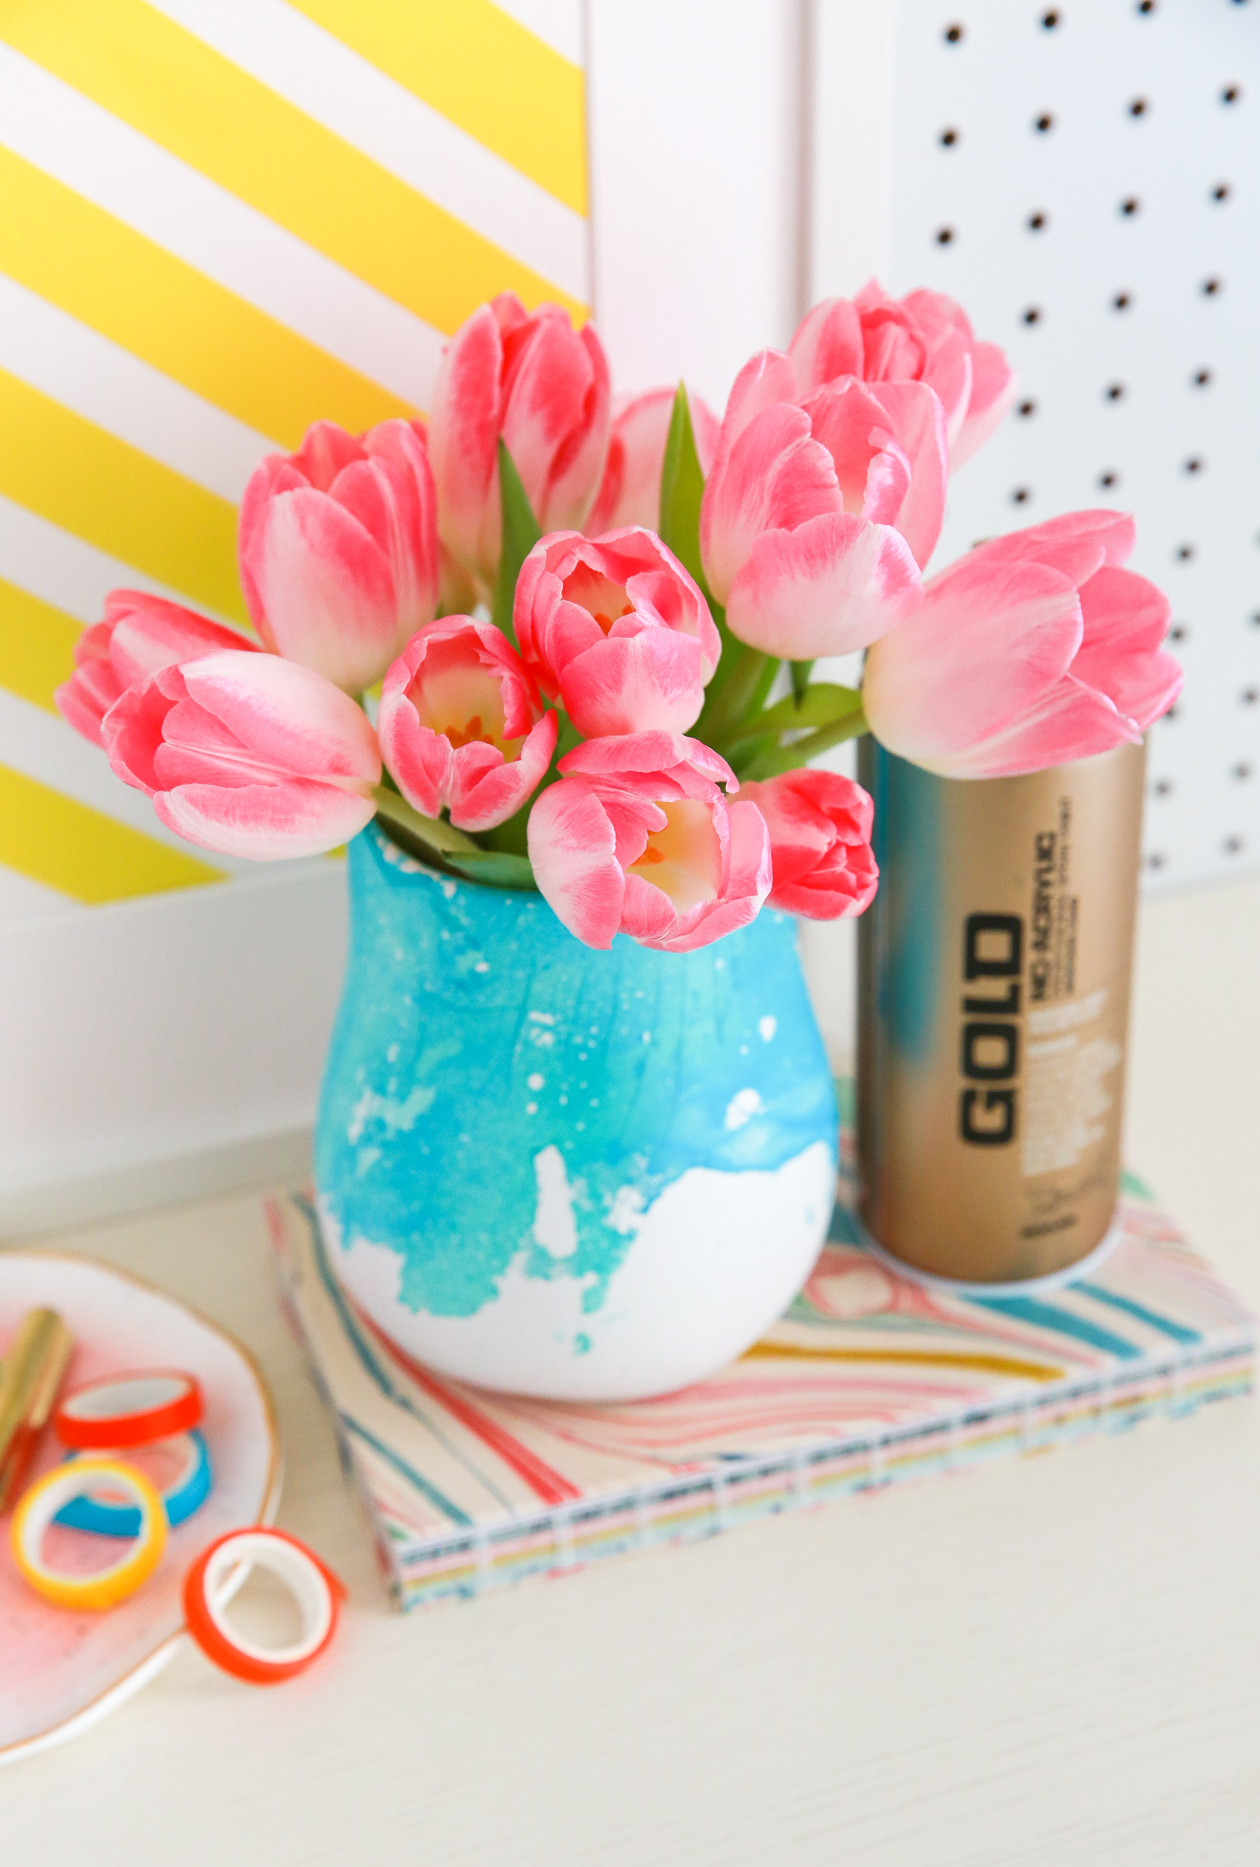
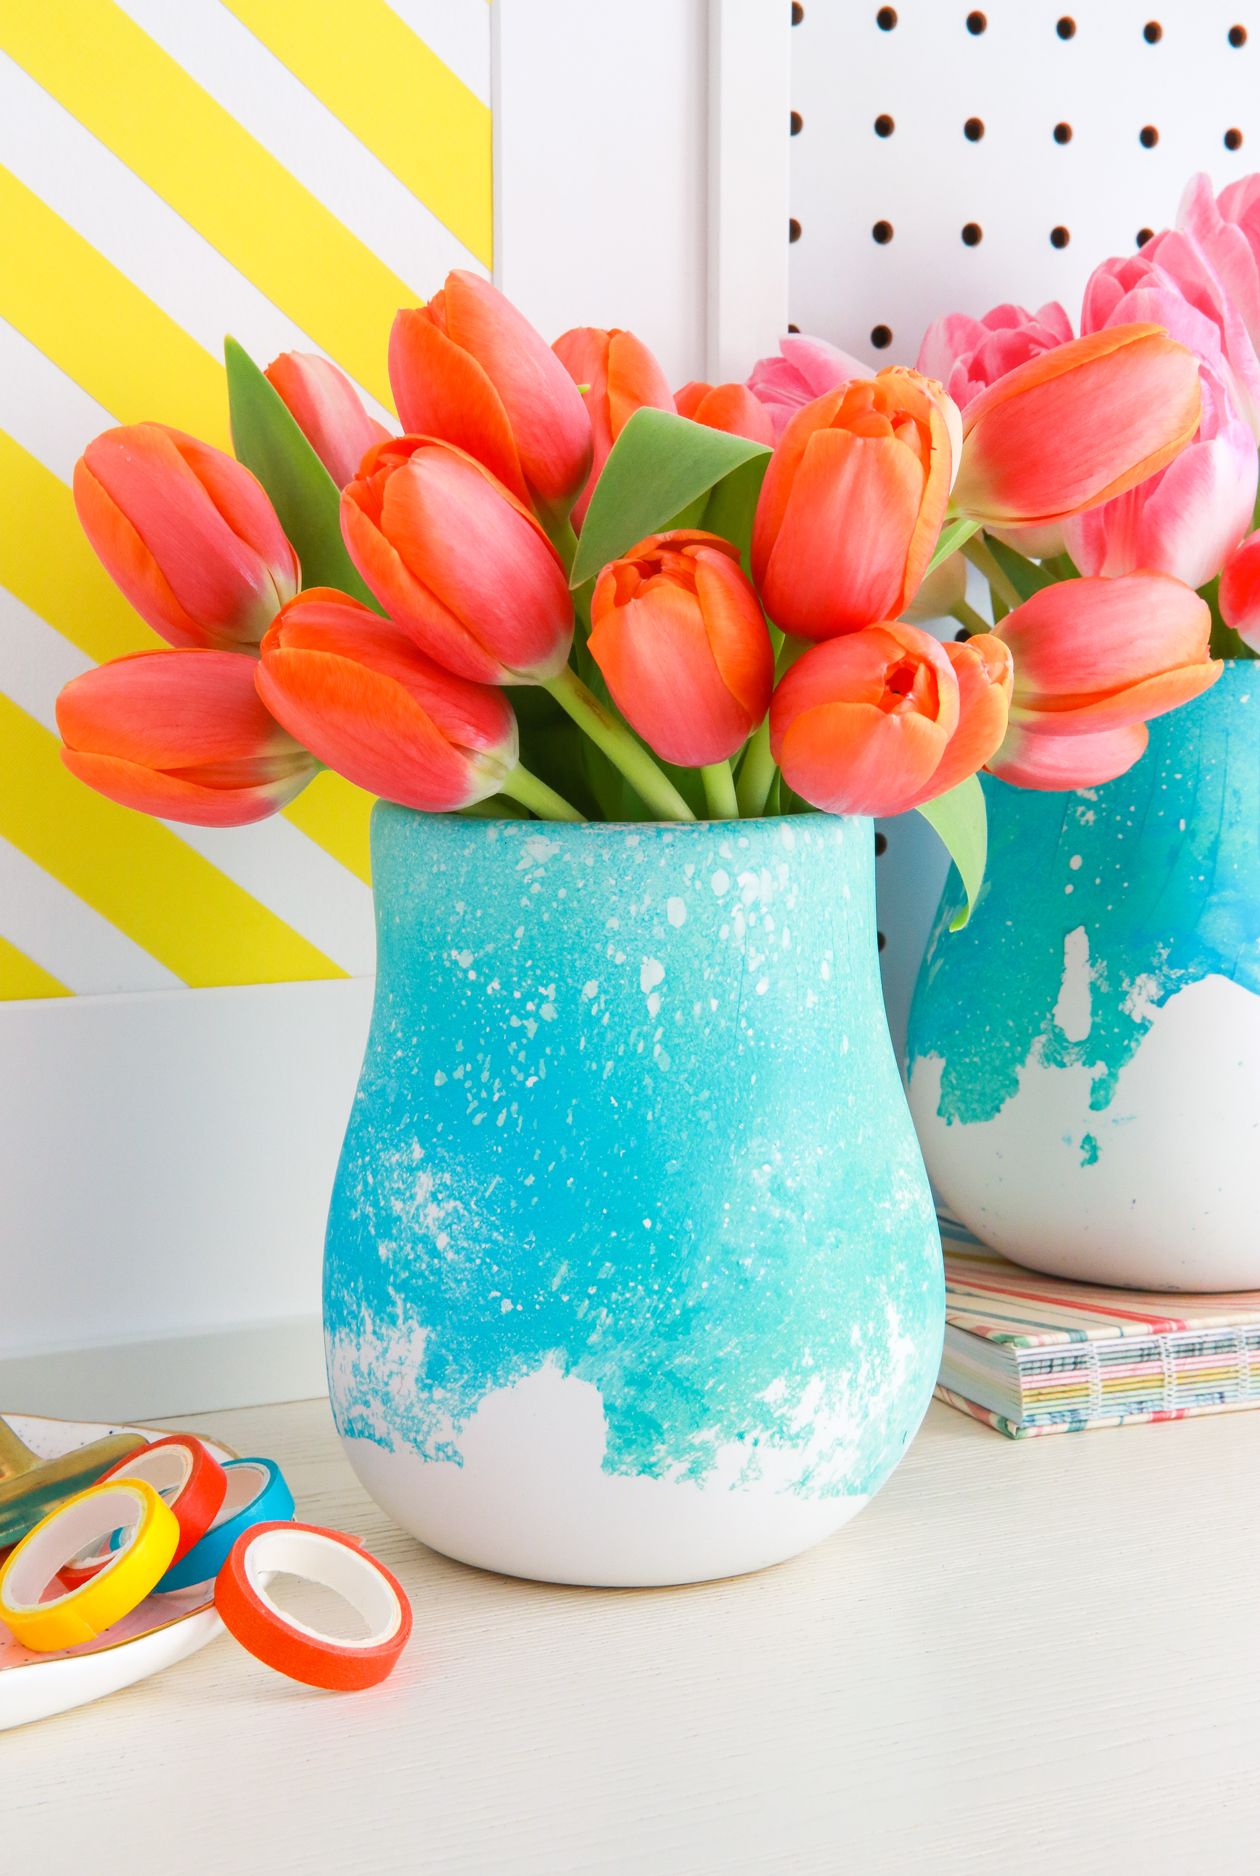
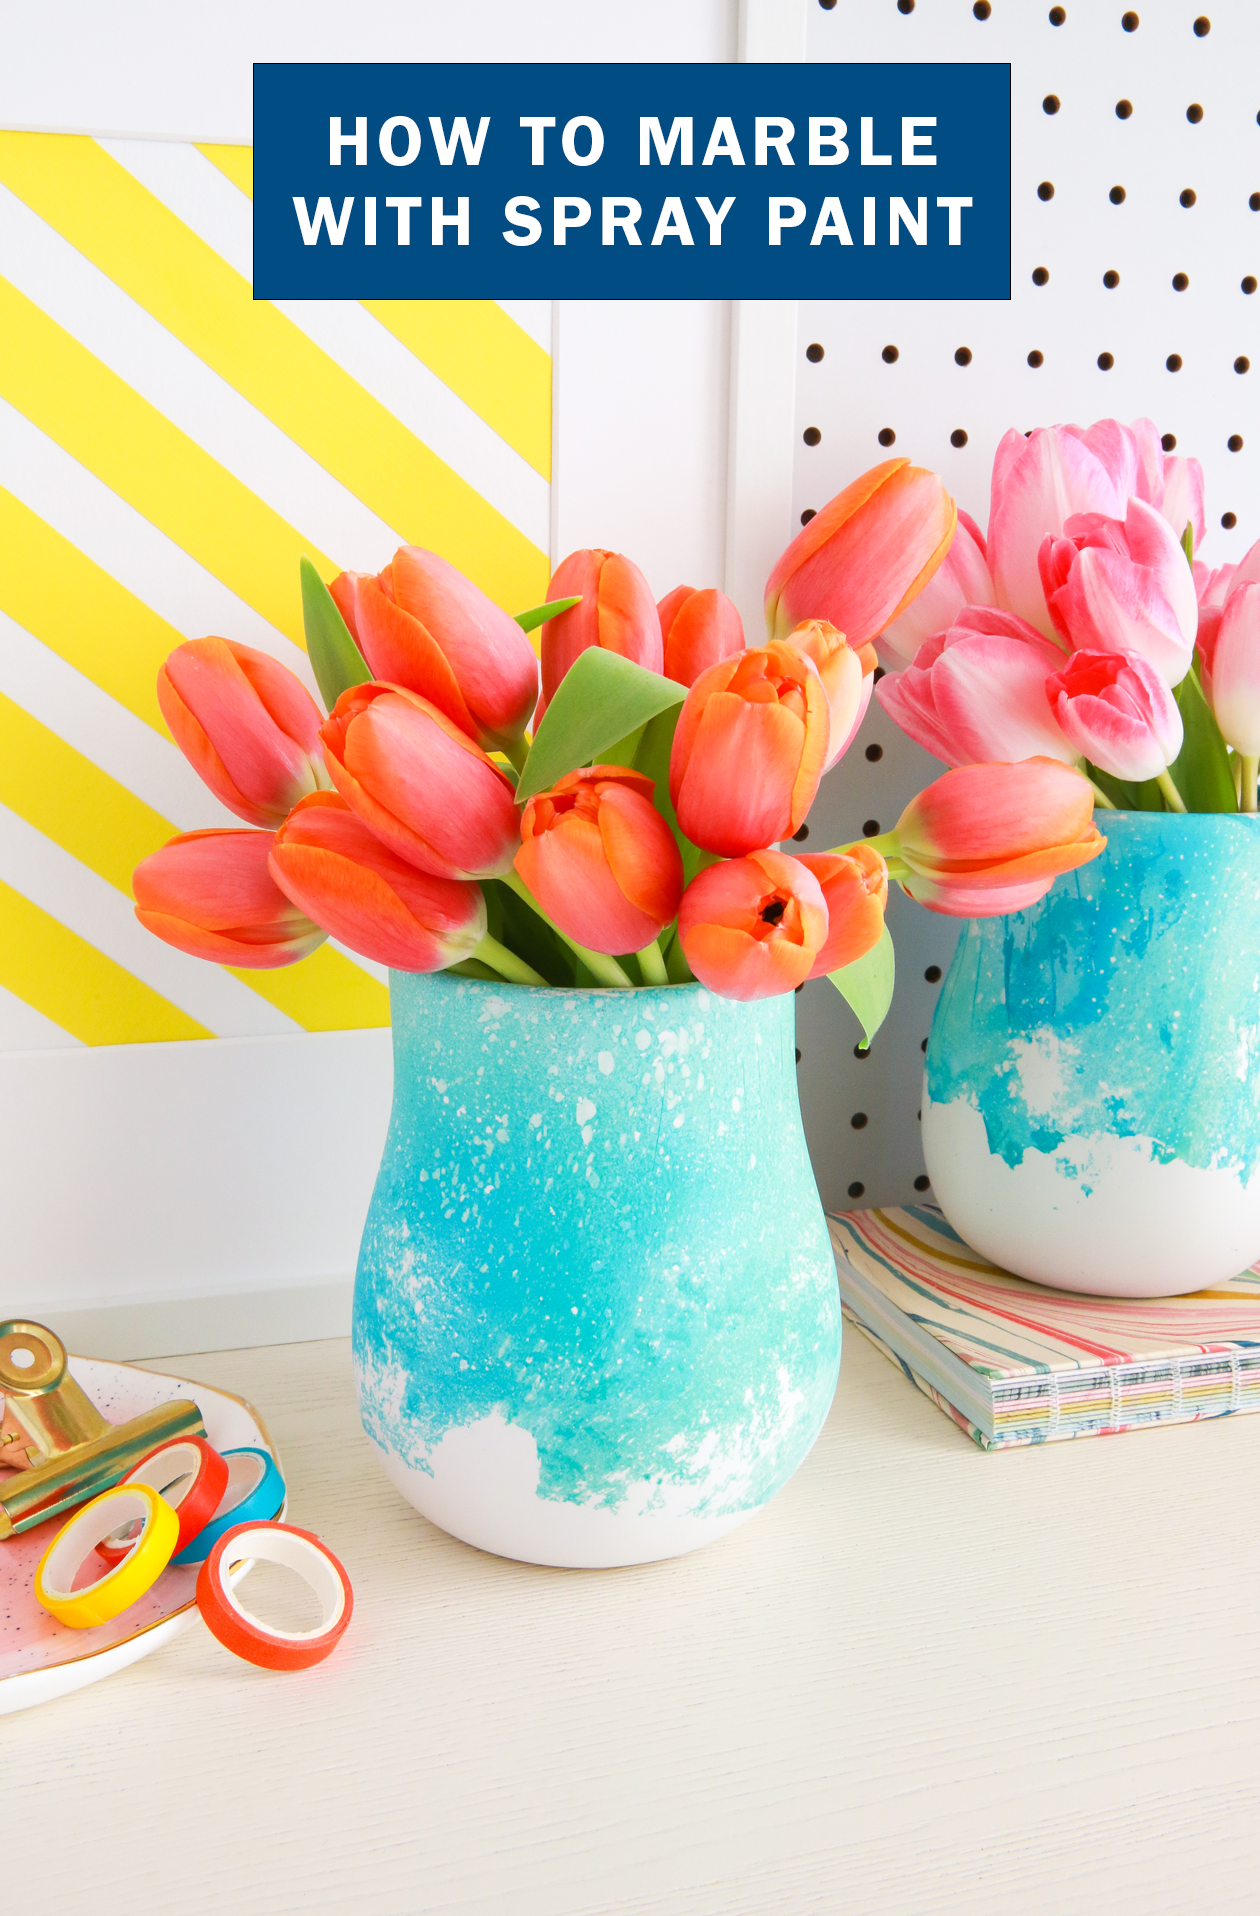
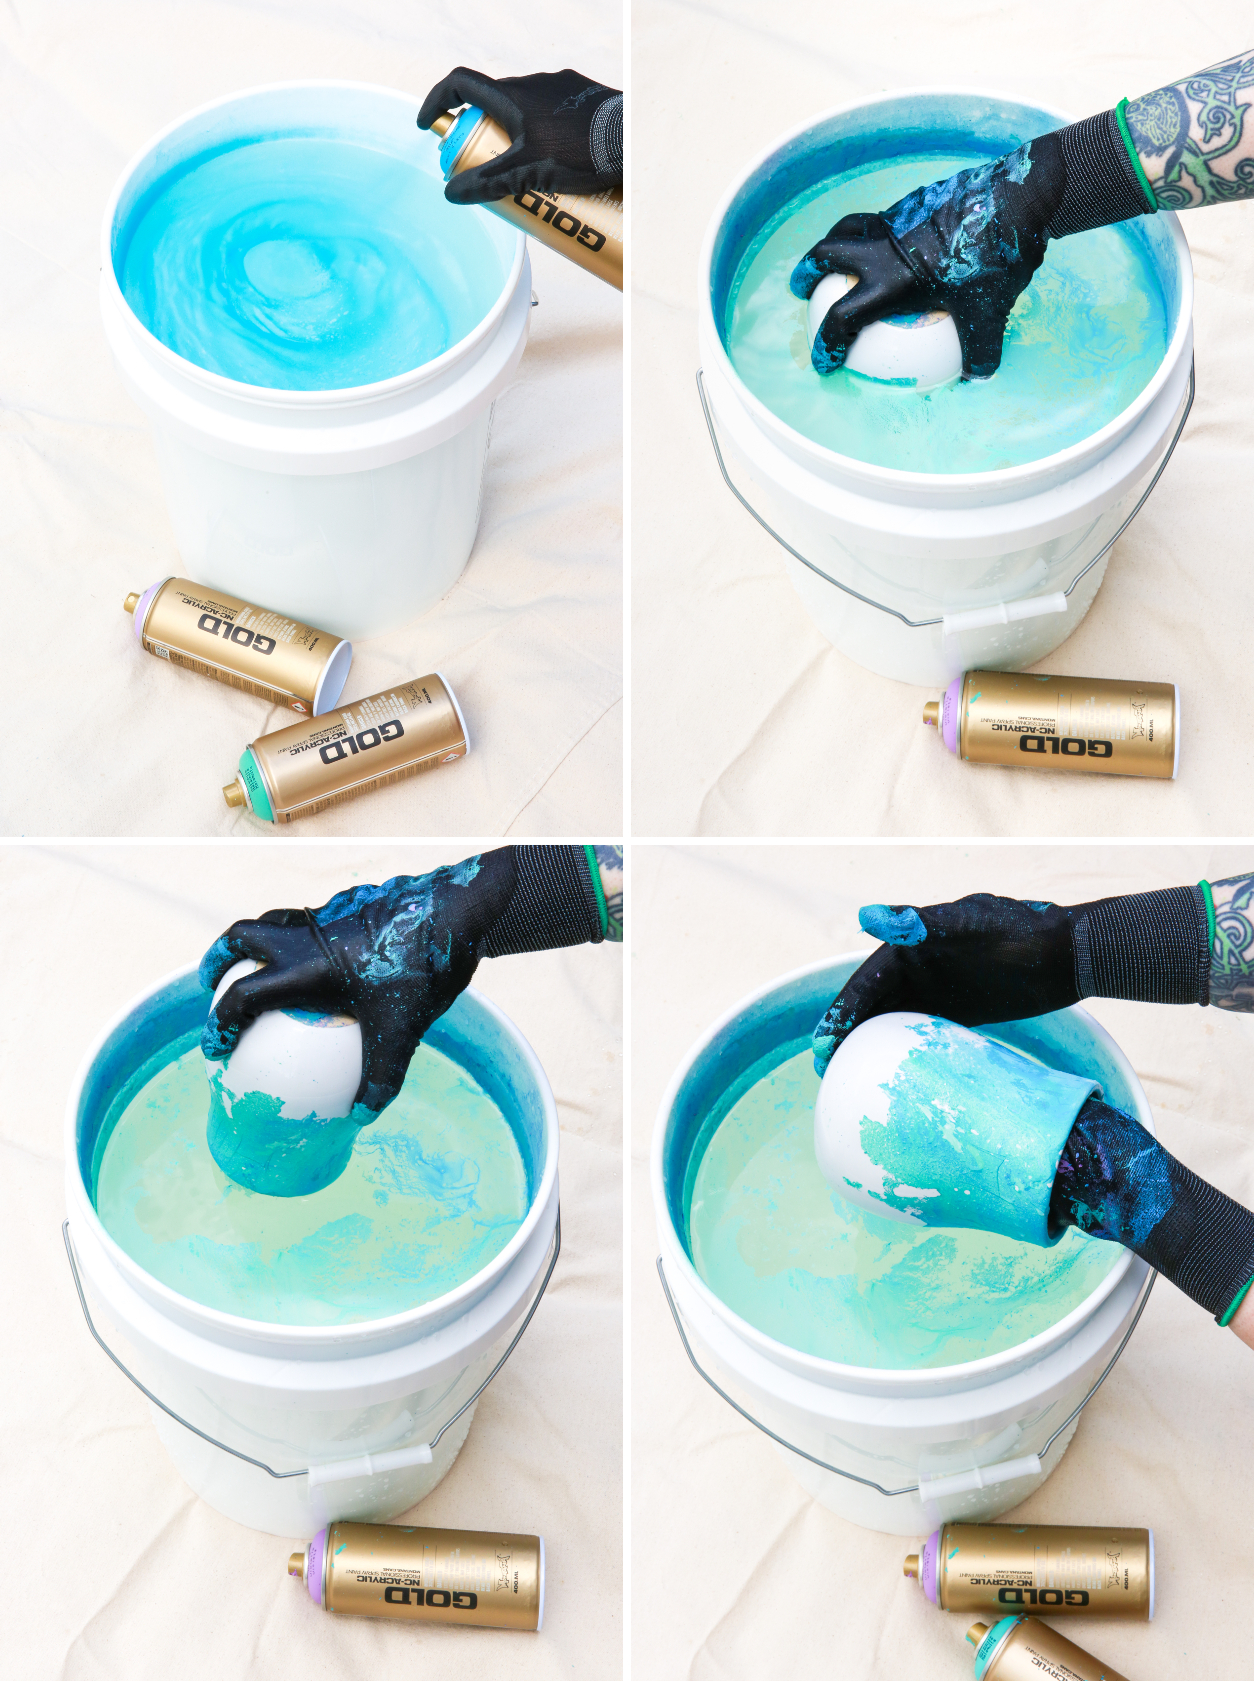
For this DIY, I used a technique of marbling with spray paint and water. Yes that’s right– you can marble with spray paint to create one of a kind patterns. I’m so excited to share this method with you because it’s such a game changer. Here’s how:
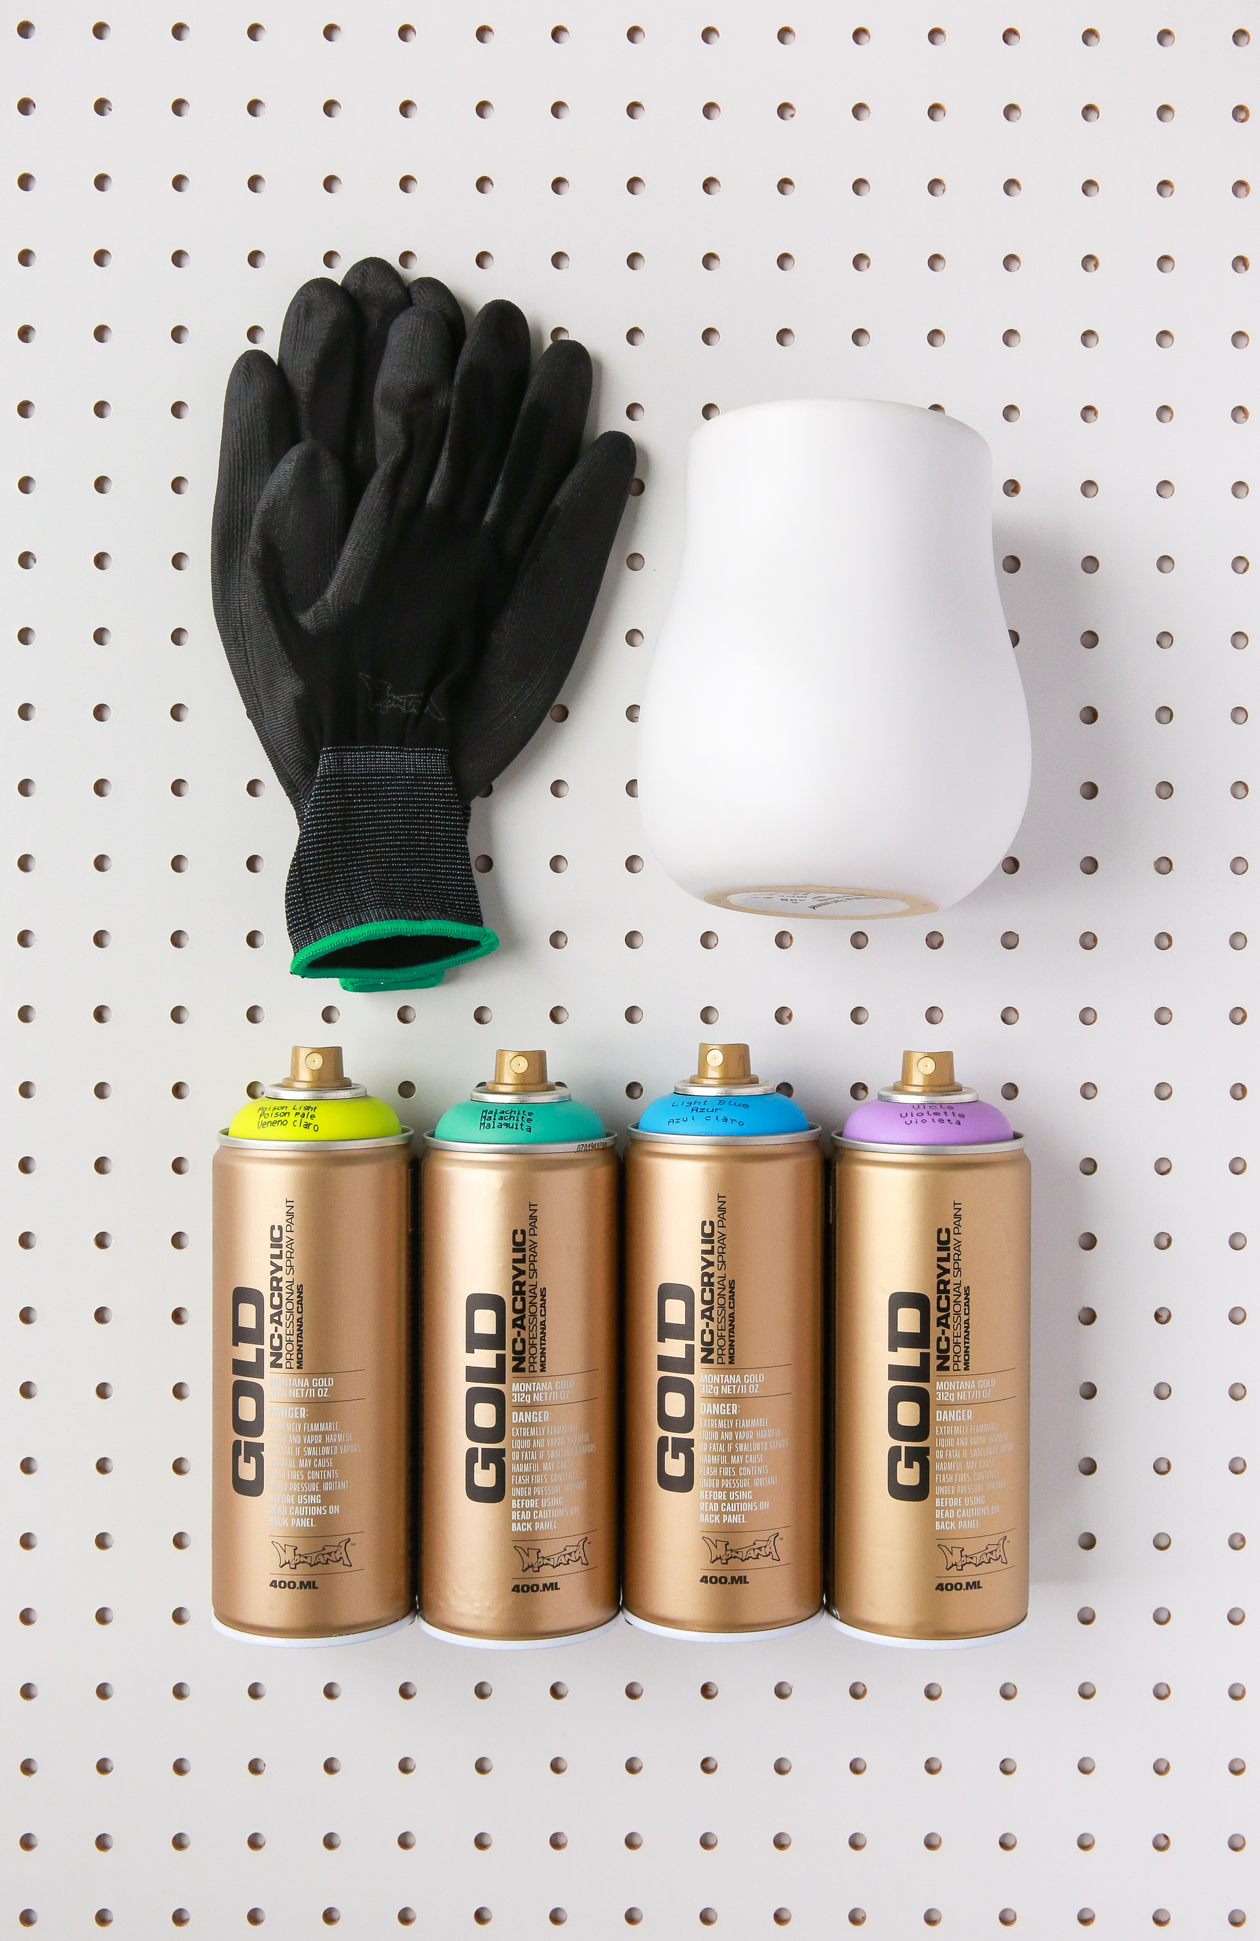 Materials
– Montana GOLD spray paint (now available at Michaels!)
– Bucket/container with cold water
– Vase or other ceramic home decor item
– Gloves
– Drop cloth
– Varnish spray
If you’ve been reading this blog for a while, you know Montana GOLD is my go-to spray paint (their colors seriously can’t be beat). And are you ready for the exciting news?! You can now find it at Michaels, both online and in stores!
 Be sure to work outside for this project, in a well ventilated area. Note: if your surface has a glossy finish, you’ll want to prime the item before proceeding to help the paint stick better.
1. Fill your bucket with cold water. It also helps to not work outside on a hot day or in direct sun.
2. The process of spraying the paint to dipping your item will be quick, because you have to make sure the paint doesn’t dry on the surface of the water. Hold your can about 10″-12″ from the water’s surface and spray the paint onto the water. Too much paint and it might clump up.
I also found that if using 2 colors, it helps to spray them at the same time to keep the paint from drying. The more you move the cans around when spraying, the more they’ll marble together.
I recommend experimenting and testing the method before trying on your final piece. The marble effect process can be a bit tricky, but you’ll eventually get the hang of it!
3. Dip your item into the bucket. It’s best to hold a section of the item that will not come in contact with the paint. While the item is underwater, give a twist with your wrist to break up the rest of the paint that’s remaining on the surface. Be careful when lifting out of the water as the paint will shift and move if you touch it while wet.
4. Let dry completely then seal with varnish.
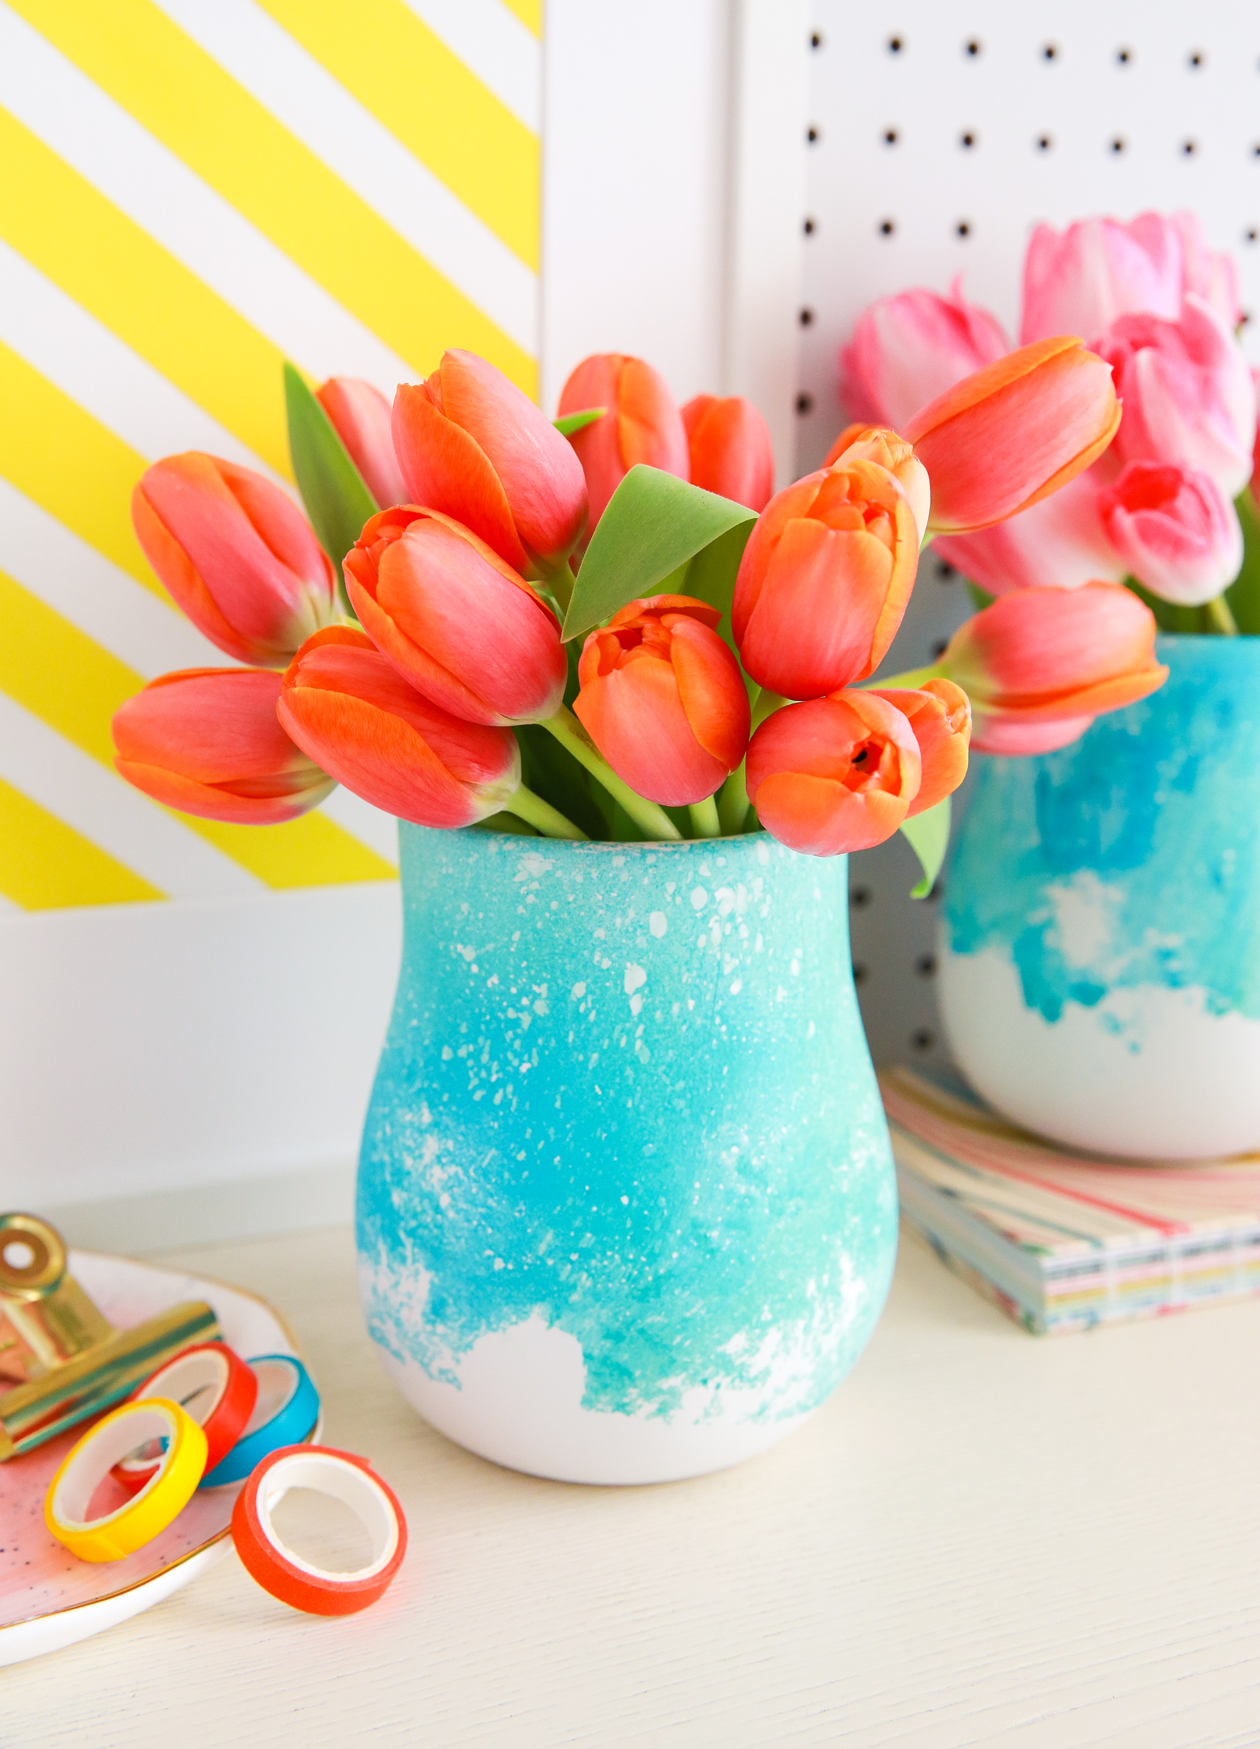 I used two colors in the same palette (light blue + malachite) so that they would blend together seamlessly. There are so many amazing color combos that you could try. I’d love to see this in a warm + cool color way.
The movement of the water will still produce beautiful results even if you stick to a single color. It’s worth stopping by the thrift store for containers to experiment on before starting!
 I absolutely love the organic feel the water technique gives and how each piece is so unique. The droplets give almost a water-like texture that would be impossible to replicate if just spraying painting directly onto the item. I can’t wait to try this marbling technique out on other items!
Let me know if you decide to marble with spray paint or if you have any questions about the process!