Time: 3-5 minutes
Materials: thread, needle, shank button, scissors, fabric
Before jumping into a 4 day make-a-thon known as Craftcation, I decided to brush up on the little sewing skills I have. While glitter dipping will always be my craft of choice, it’s nice to have a base of practical skills. I’ll be sharing a DIY using this technique next week, so stay tuned!
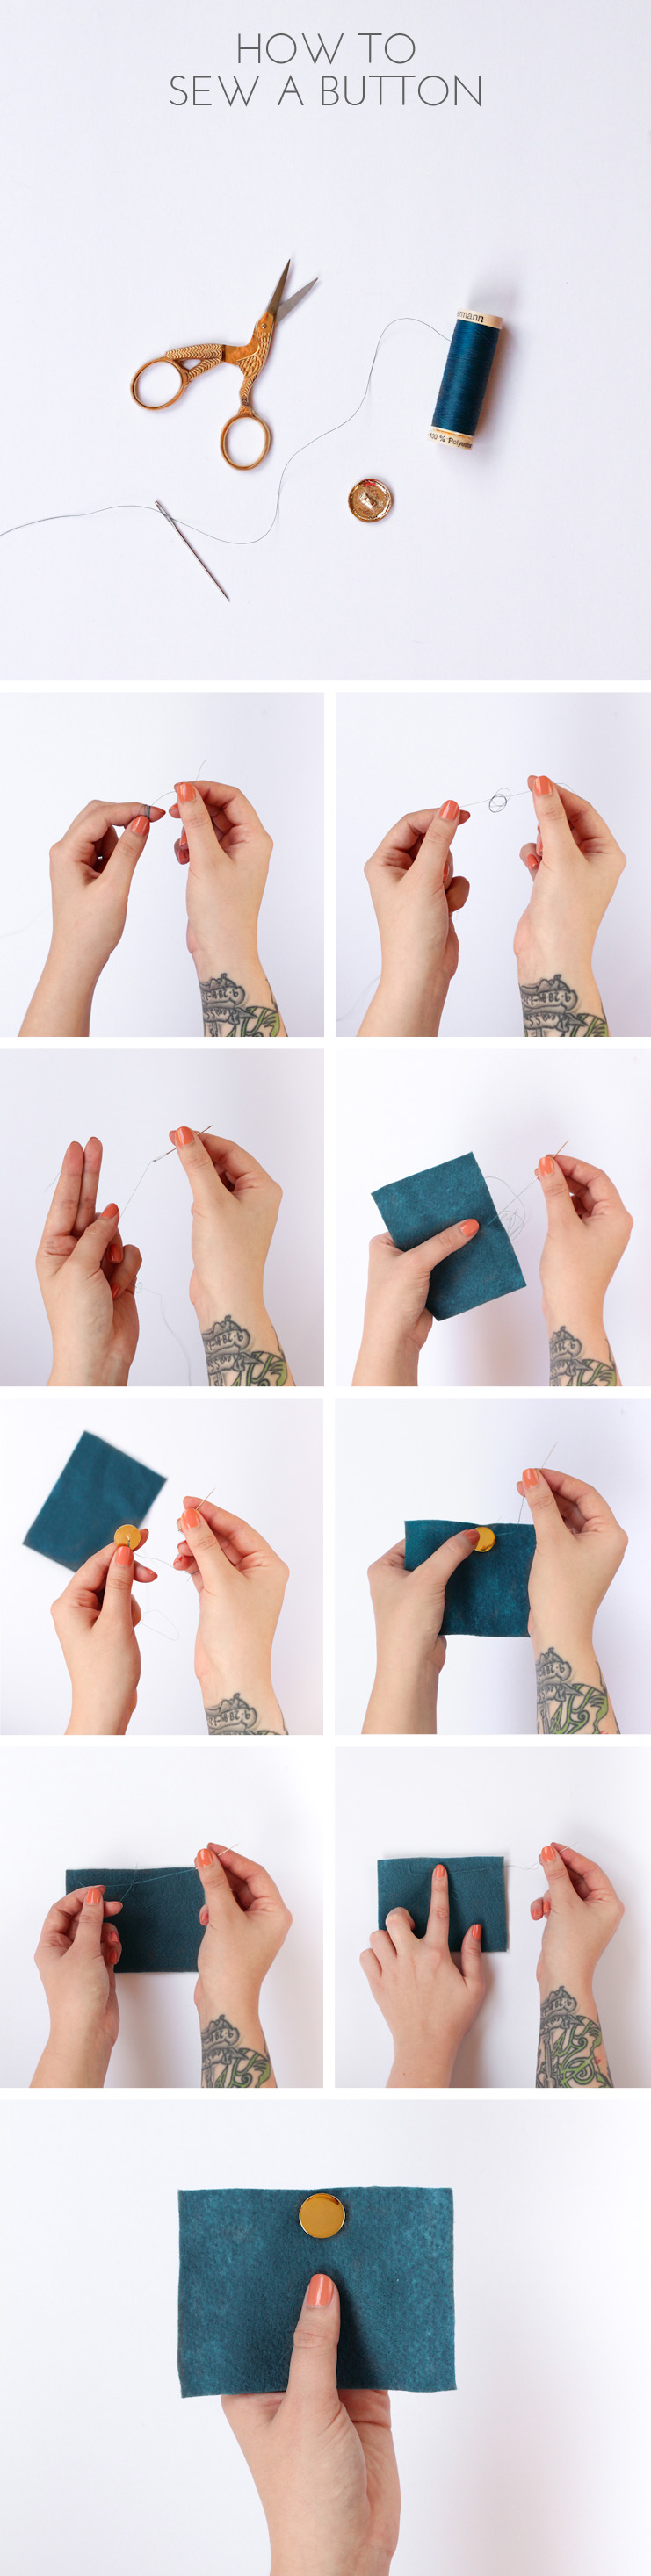
1. Measure out your thread then tie a knot at the end. For a more durable hold, double layer your thread.
2. Thread your needle.
3. Pull your threaded needle through your fabric once. The knot should be on the back of the fabric so the button faces outward.
4. Pass your needle through the button shank then pull button down until it’s touching the fabric. The needle should then go back into the fabric near the original stitch.
5. Hold the button in place with your thumb and continue the process of passing the needle up through the fabric, through the shank, then back down until button is secure. It should take about 10 times, but you can always do more to be safe.
6. Tie your finishing knot in the back when done.
Today my dear friend Mere and I are heading south to Venture, CA for Craftcation. In case you haven’t heard of the conference, it’s a crafters DREAM! While there, I’ll be attending lectures on how to run a creative biz plus taking workshops like dressmaking 101, fresh flower accessories, gift wrapping and more. I can’t wait to share what I’ve learned with you when I return, but in the meantime, you can follow along on my Instagram feed.