It’s reveal day for my Ikea Pax Wardrobe hack project! Finally!
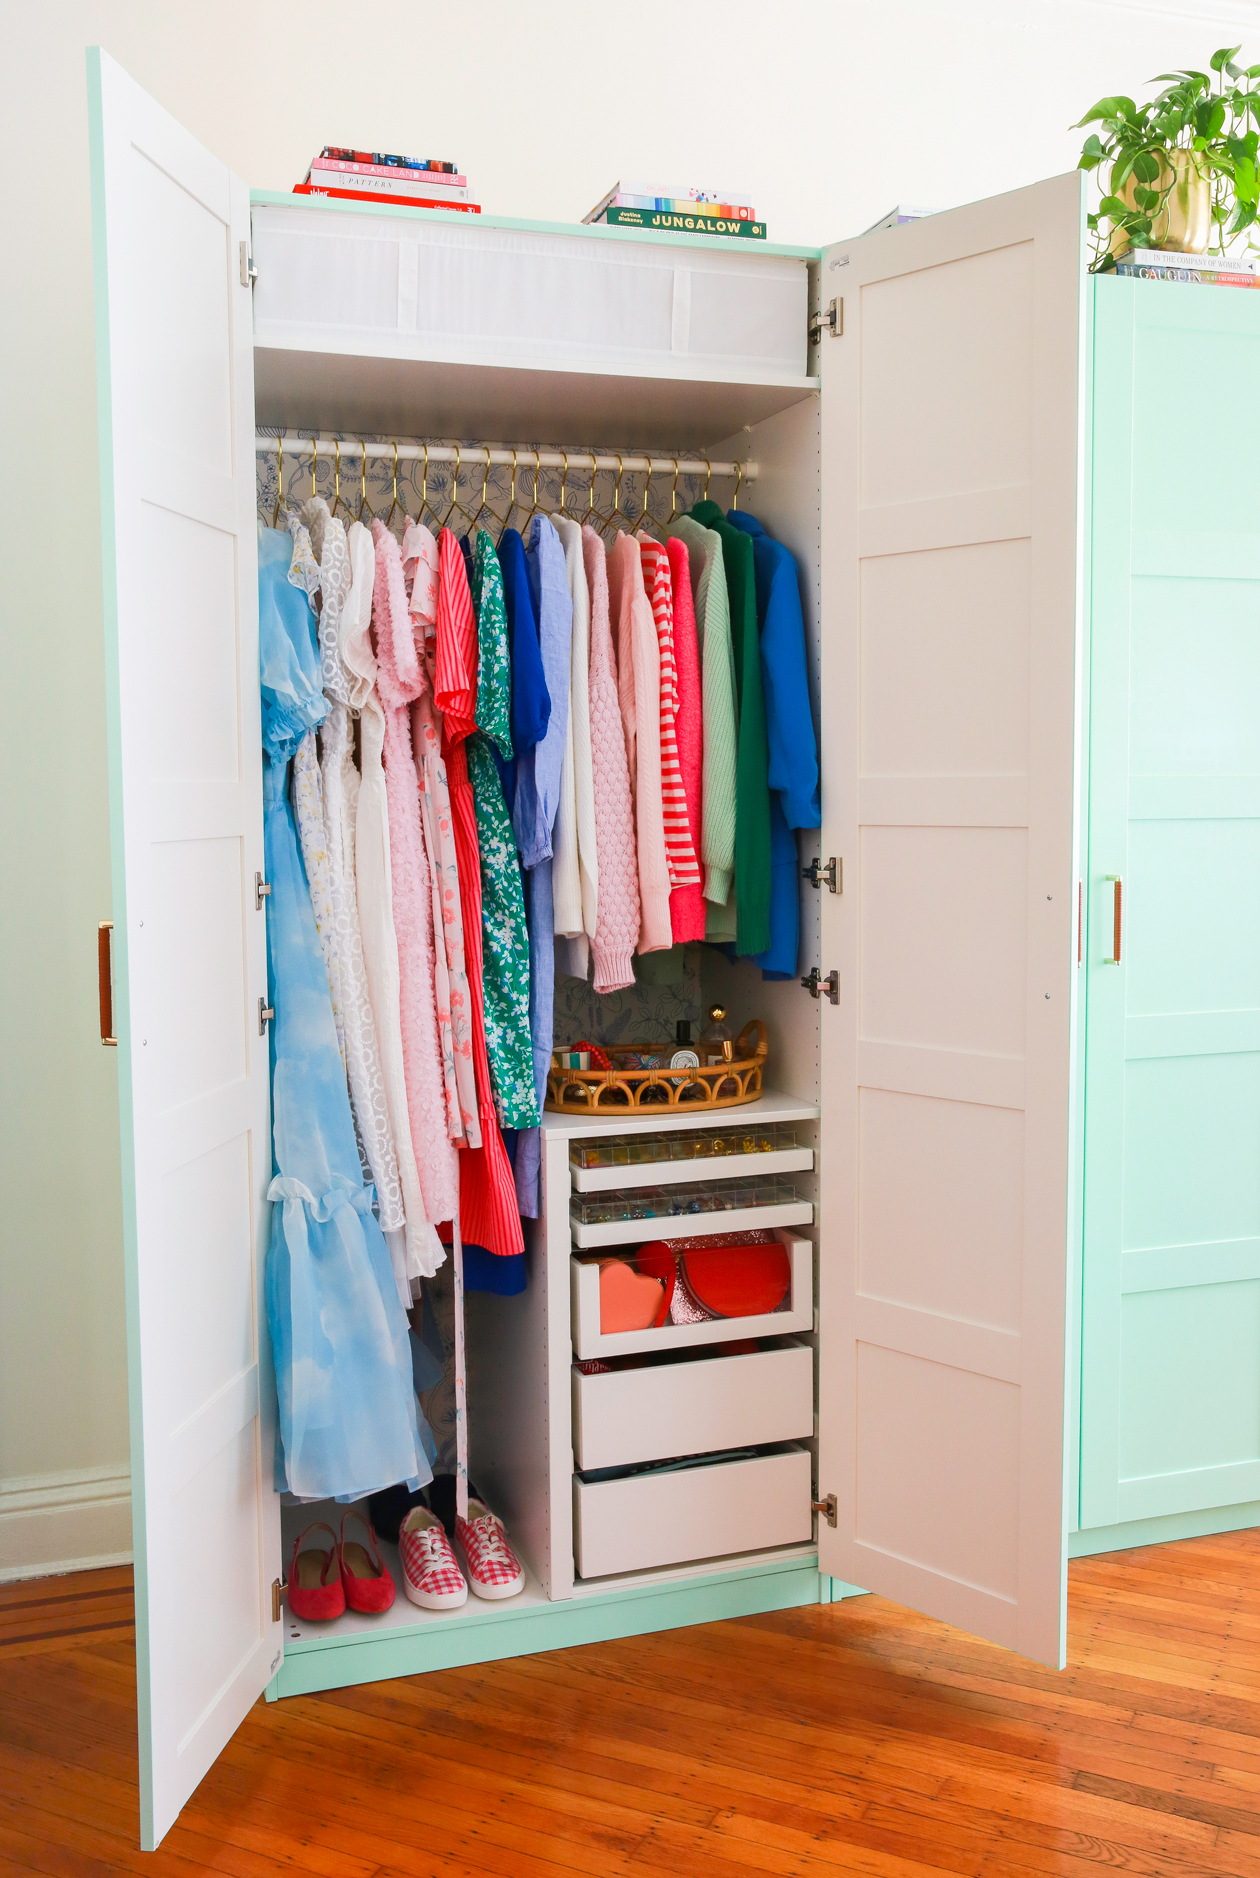
I’m so happy with how this unit came together and it’s been beyond helpful for storage. The customizations made were simple, but they made a huge impact on the overall design and feel of the wardrobe. I can’t wait for you to see everything, so let’s just jump right into it. Here’s a look at the inside of our Pax Wardrobe:
I put together a YouTube video for the entire process of this DIY that you can watch here! You can also skip to the entire for a walkthrough tour of the inside of the wardrobe if you prefer!
 If you happened to miss the earlier parts of the project where I went over all of the DIY steps, you can check them out here:
Part I: Why We’re Getting a Wardrobe
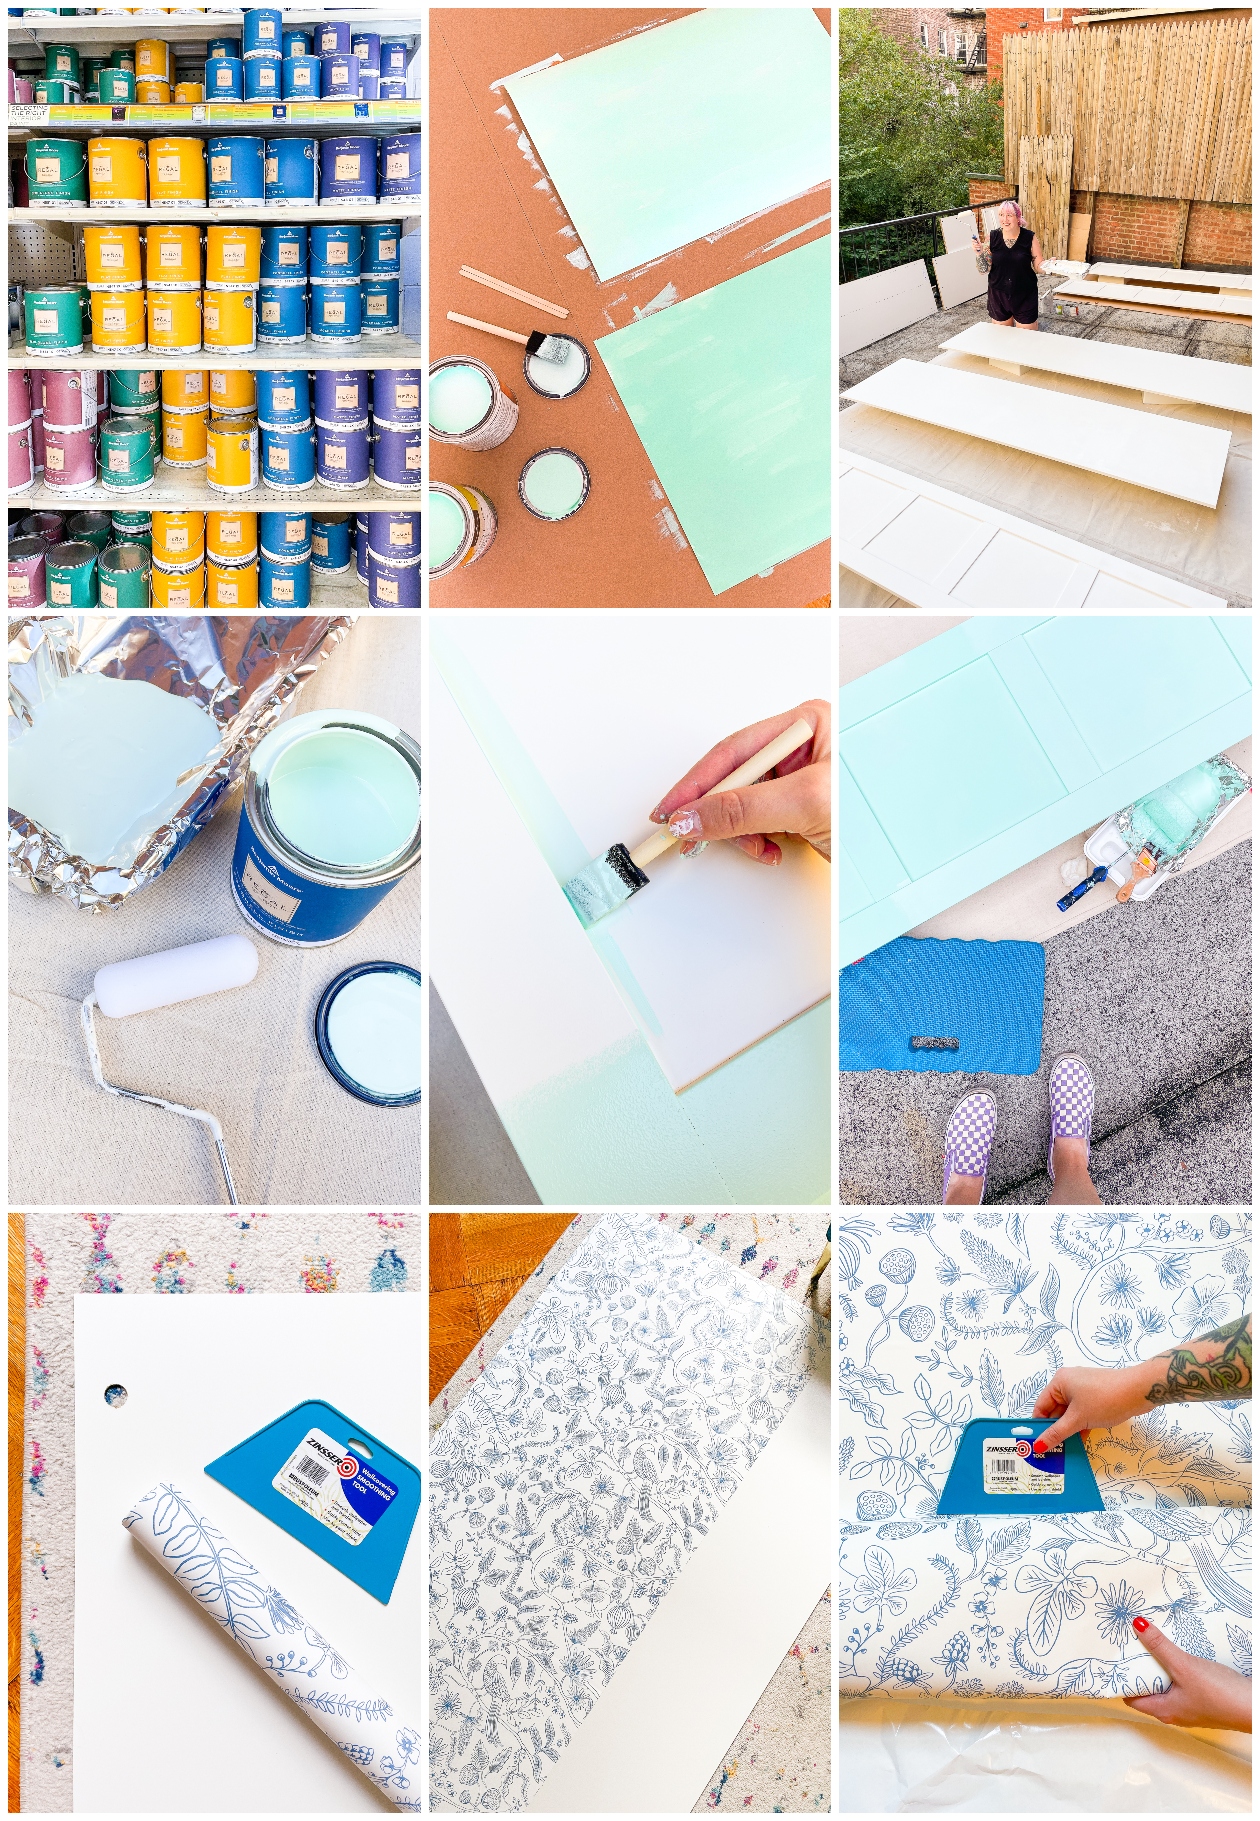
Part II: Picking a Paint Color
Part III: How to Paint Ikea Furniture + Apply Wallpaper
 What I Used for the Pax Hack
This post contains affiliate links
From Ikea
– PAX Wardrobe Frames (2 at 92″ tall)
– BERGSBO Doors (4)
– KOMPLEMENT trays + accessories
From Hardware Store
– Sandpaper in 120 grit
– BIN primer
– Benjamin Moore paint in Tropical Pool
– Polycrylic
– Paint brushes + rollers
– Drill
Miscellaneous
– Peel and stick wallpaper
– Brass + leather 6″ handles
– Drawer dividers (mine were custom from this shop)
– Gold hangers
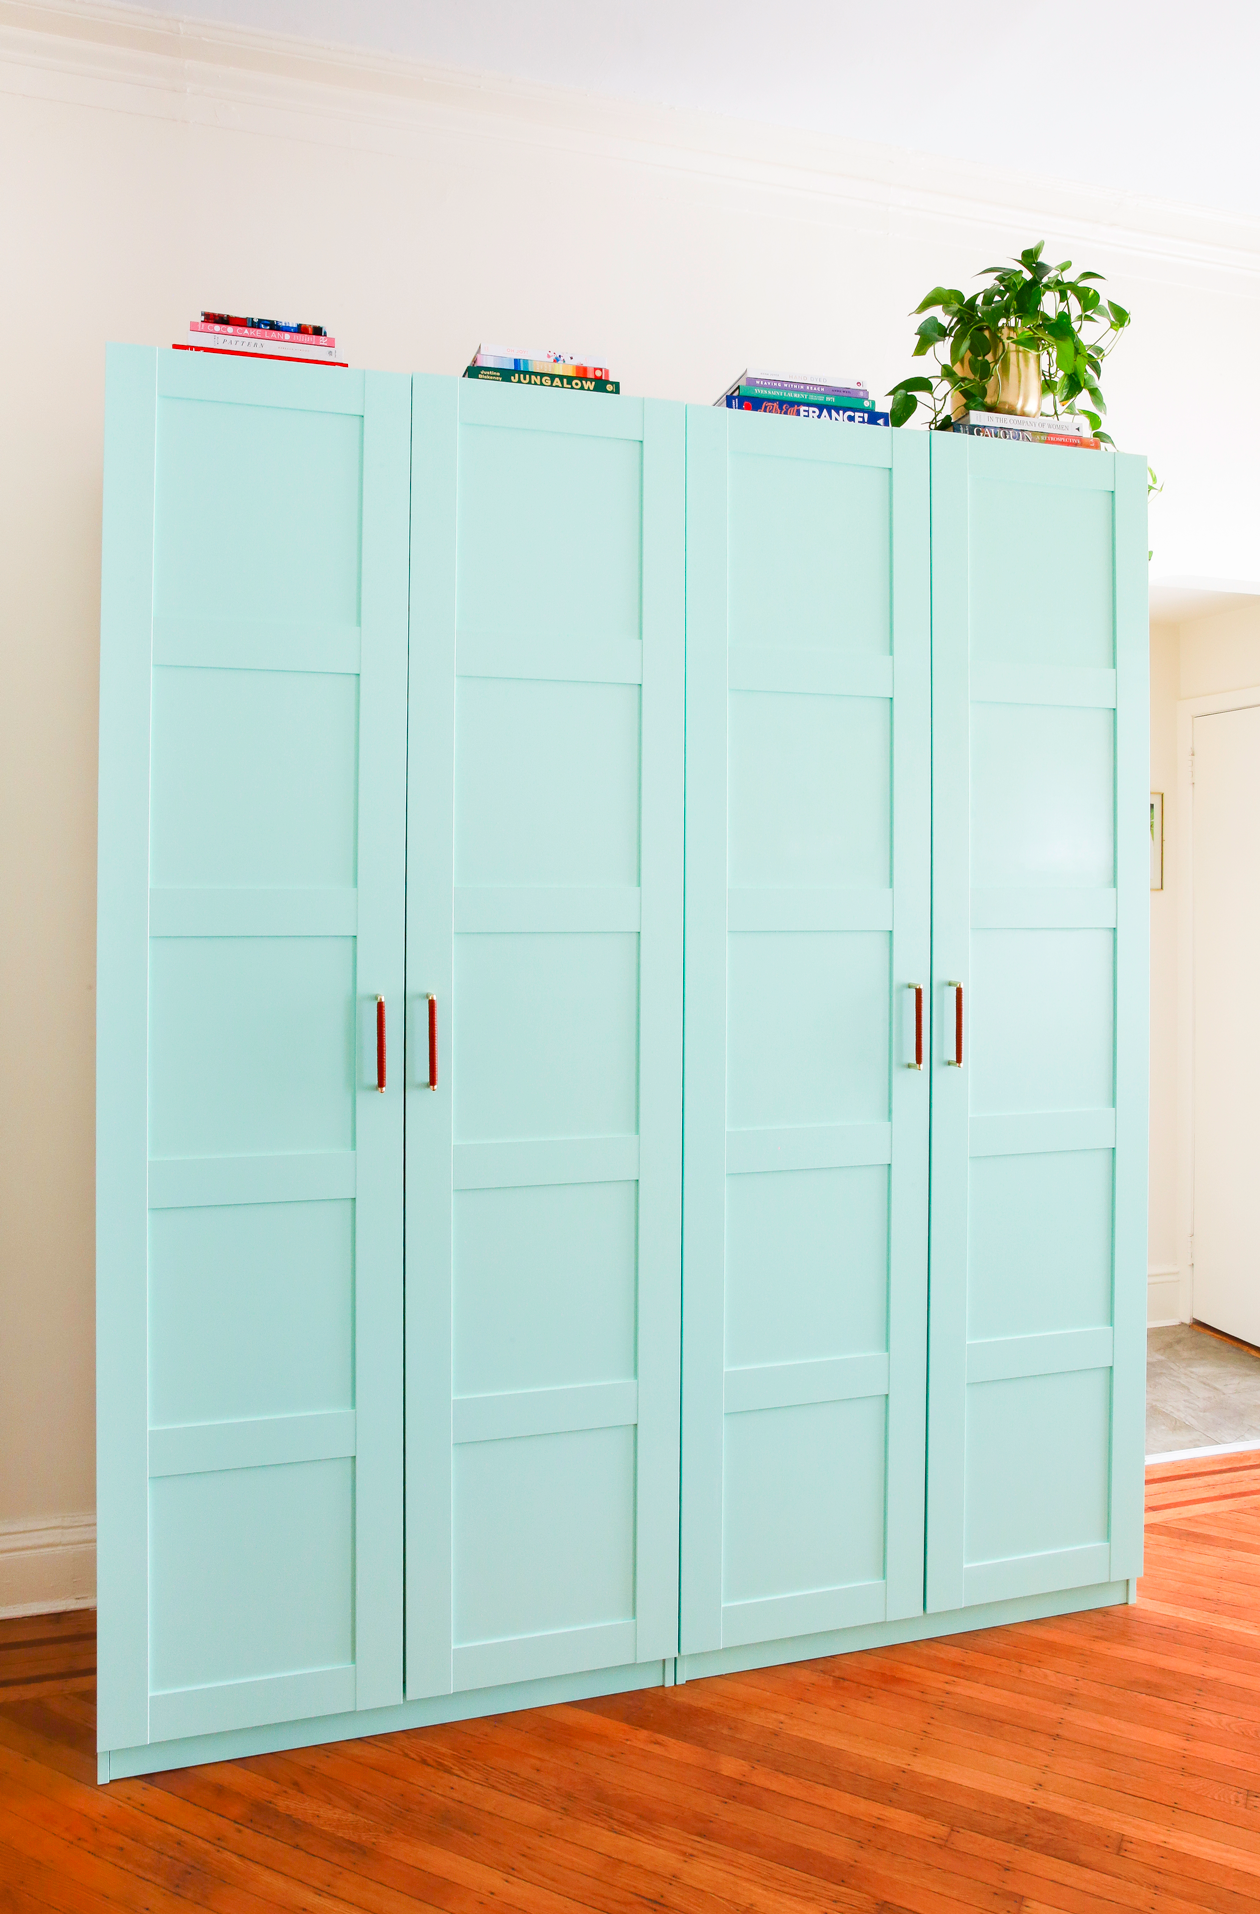
 The Wardrobe Reveal
After painting, wallpapering, and adding handles, the wardrobe came together nicely!
I kept the inside of the wardrobe white for a few different reasons. I love how colors pop against white, so I wanted my clothes to stand out when the doors were open. It also meant less time painting the project. I can always go back in to add more paint or wallpaper in the future, but for now I like it as is.
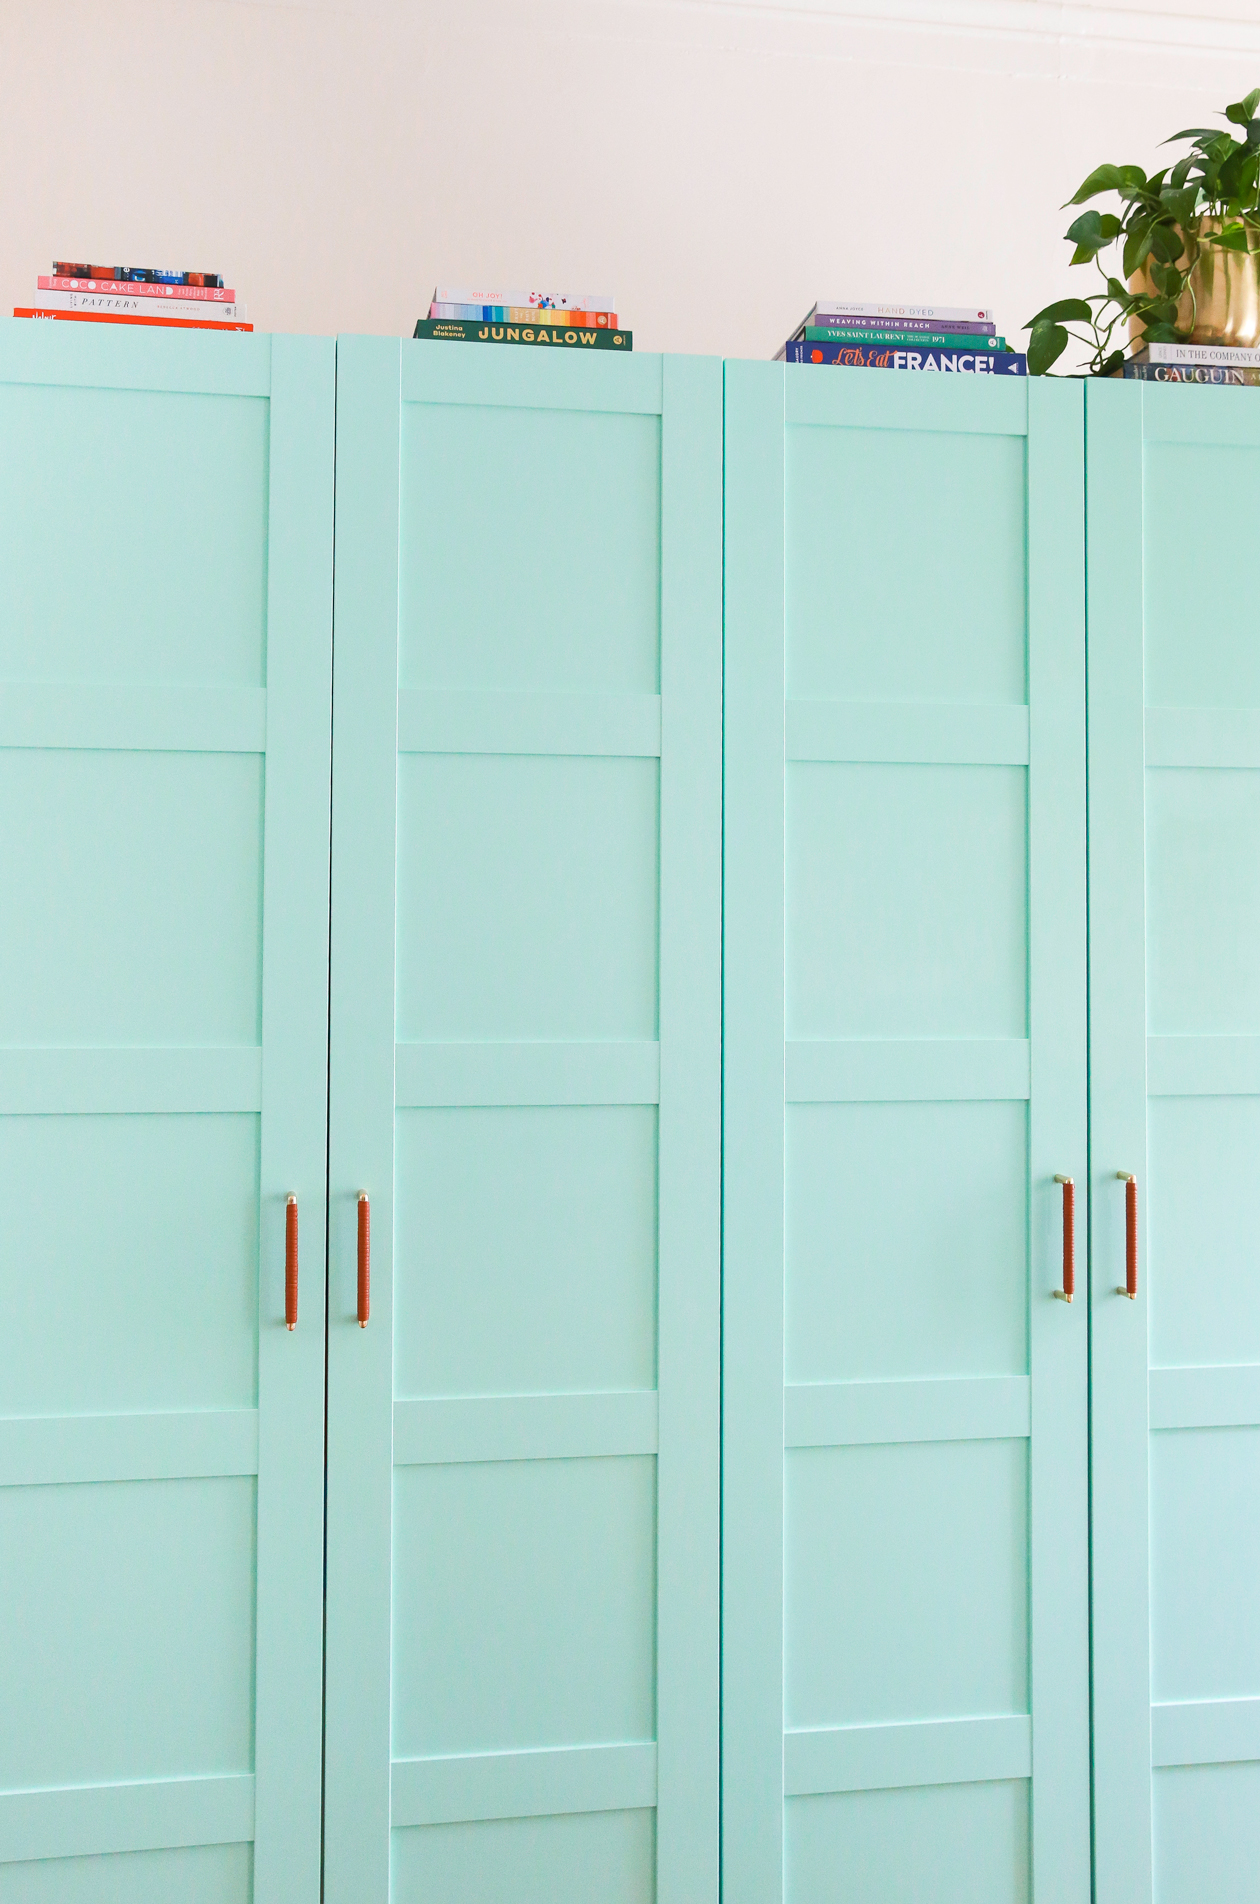
 Can we get a little commotion for the wallpaper?! The pop of wallpaper might be subtle, but I think it’s those small details that help a DIY really come together. After adding wallpaper to the back of the hutch makeover, I knew I had to bring that detail to this project too. And I’m so glad I did because I love seeing the flowers and birds peek out from behind the clothes.
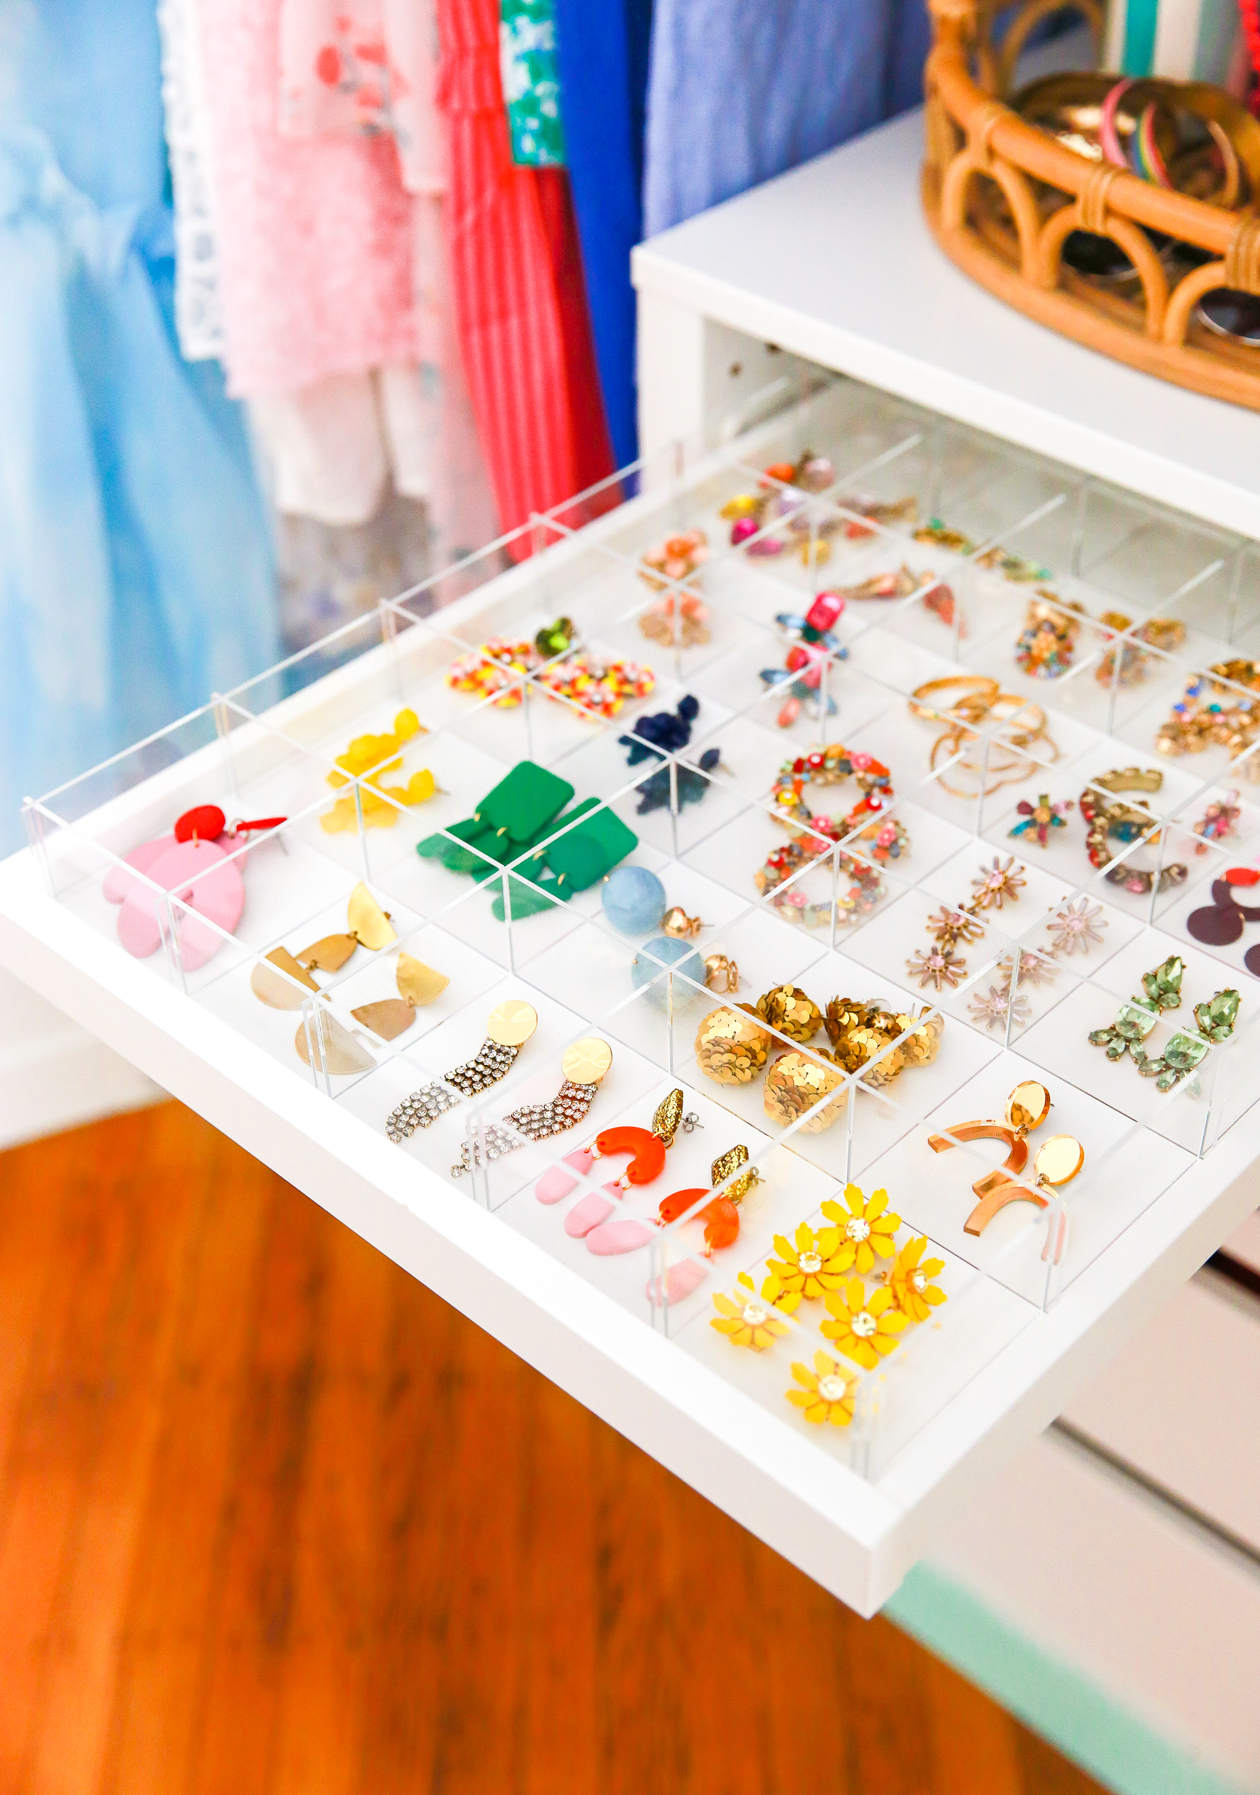 Custom Drawer Dividers
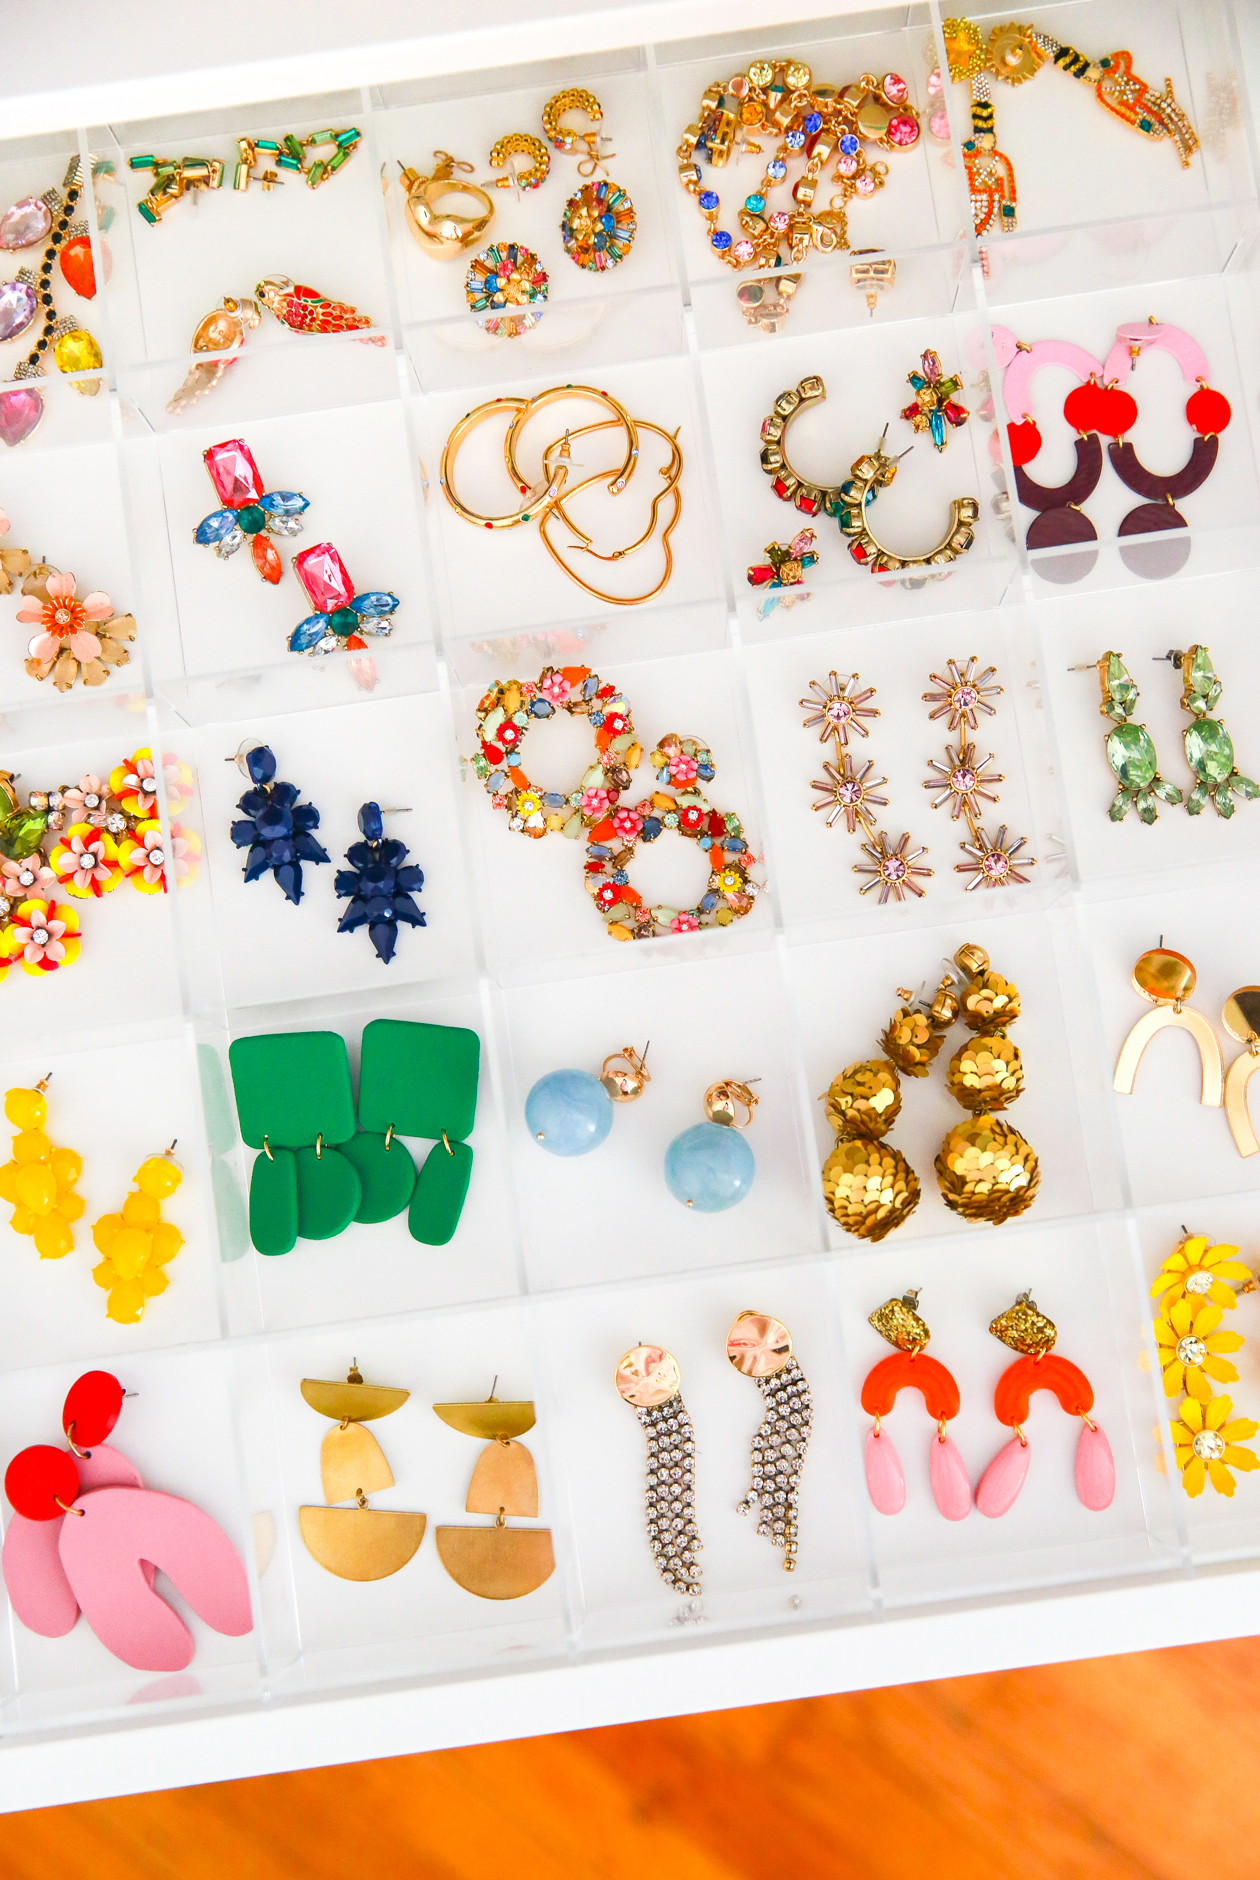
One of my favorite things about the entire wardrobe is that I finally have storage for my jewelry! I have such a love for statement earrings (which you may remember from this Wish List post), and haven’t had a great way to store them until now.
I searched high and low for a good solution and even did a few mock ups for making my own dividers. Nothing I found was quite right, so I ended up finding an awesome Etsy seller who was able to custom make them for me. Two full sets with shipping cost around $120 and they were so worth it. Now I can see all of my jewelry and keep it organized.
 And that’s the Pax Hack! I’d love to know what you think!
Do you think it was the right call to change colors from yellow to Tropical Pool? Should I use the same wallpaper on the walls in my office? Let me know if you have any questions in the comments below!