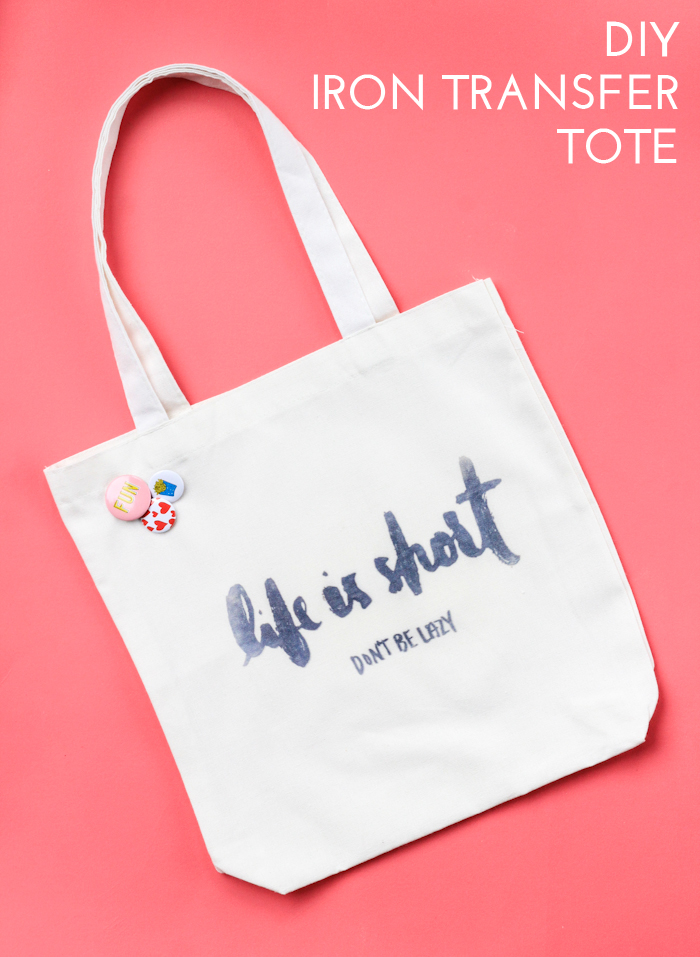
 While wandering aimlessly around the fabric store, I stumbled across an iron transfer pen. I was fairly certain it would be too good to be true, maybe best just for mapping out embroidery lines, but I’m here to say that it works SO good. Instead of the vinyl or hard feel of other iron on transfers, the final version of this is smooth to the touch since it’s basically an ink transfer. It’s probably the easiest image transfer I’ve ever done (not that I’m excited or anything). Here’s how I made this tote:
Time: 20 minutes
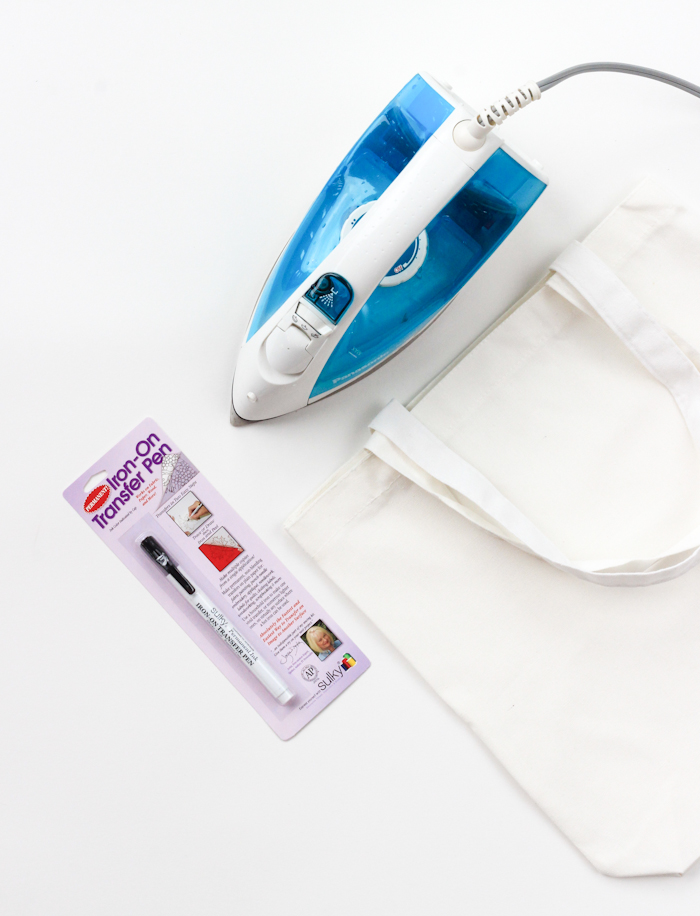
Materials: canvas tote, iron transfer pen, iron, paper
Cost: ~$8
I used one of the the free #GIRLBOSS printables Jordan Brantley made for my blog last year, but you could use any design you want. Just be sure to inverse your design before printing, otherwise it will come out backwards. Print on regular printer paper.
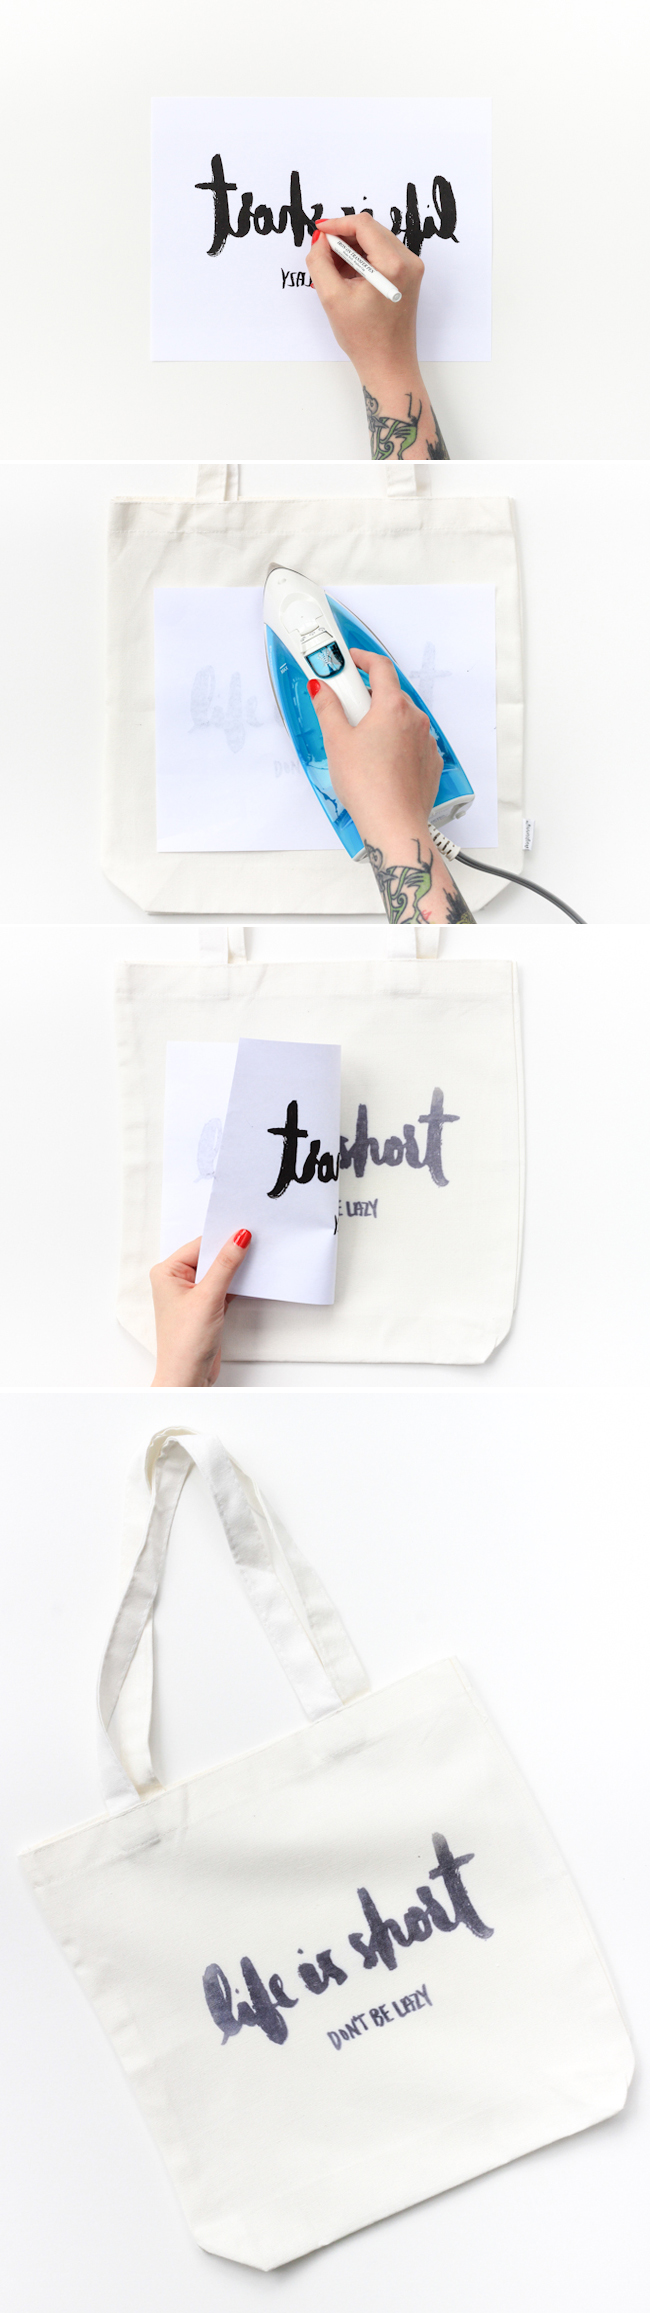 Trace over your design with the transfer pen. After doing mine with black text, I recommend making the text a different color than your pen so you can make sure that you got the entire design.
Place design ink side down and iron for 1-3 minutes. Be sure not to move your paper mid way or your design will print twice. It also helps to have something flat inside your tote so the ink doesn’t bleed through to the other wise.Lift your paper and you’re done!
One of the coolest parts about this type of transfer is that you can use the same paper again and again without having to reapply the ink! I made three totes with the same transfer.
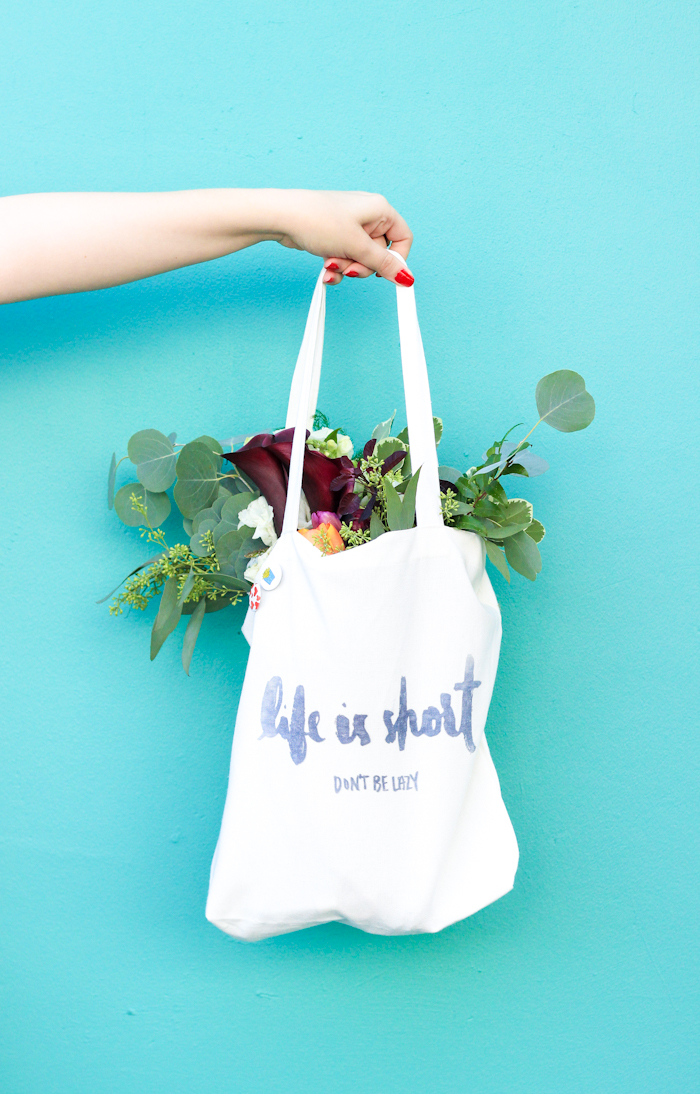
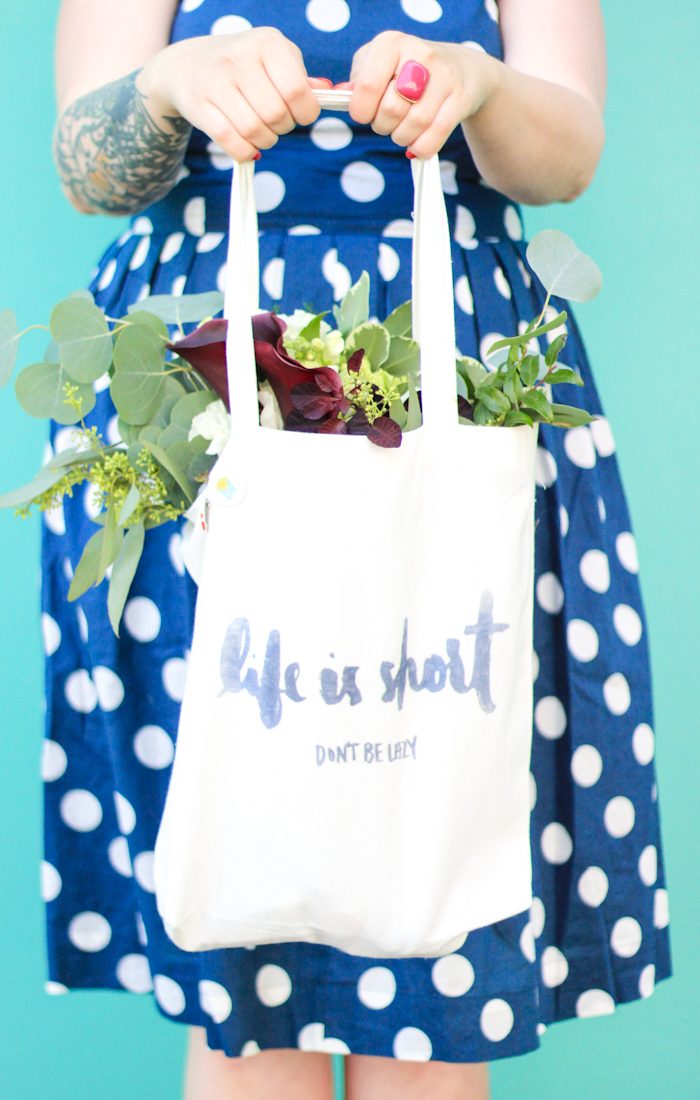
 Super cool right?! The end result has almost a watercolor feeling to it (keep that in mind if you were going for a bolder look). Have you ever worked with iron transfer pens before? Would love to hear how you used it!