As much as I love glitter, I am not so big on the mess that happens when the crafting is done. I mean, there’s a reason it’s been called the herpes of craft supplies, right? However, I have found the perfect solution for working with glitter, and it doesn’t involve decoupage. If you we’re a fan of these diy glitter bracelets, then you will love today’s project: diy color blocked glitter magnets! Here’s how:
Time: 25 minutes + overnight dry
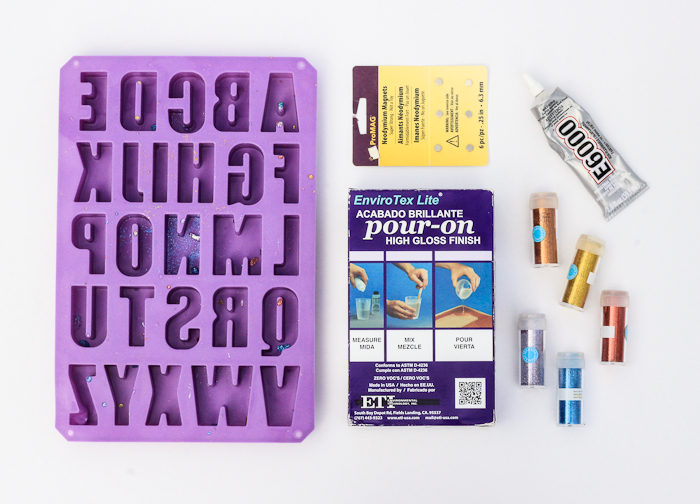
Materials: casting epoxy, glitter, silicon tray, plastic cups/stir stick, magnets, E-6000
Cost: ~$25-$30
 I am OBSESSED with casting epoxy at the moment. You can make some seriously awesome things with it. If you aren’t into glitter, but want to give this material a try, check out these dried flower coasters.
 The resin can get a tad messy if you aren’t careful. Wear gloves and cover your surface just to be safe.
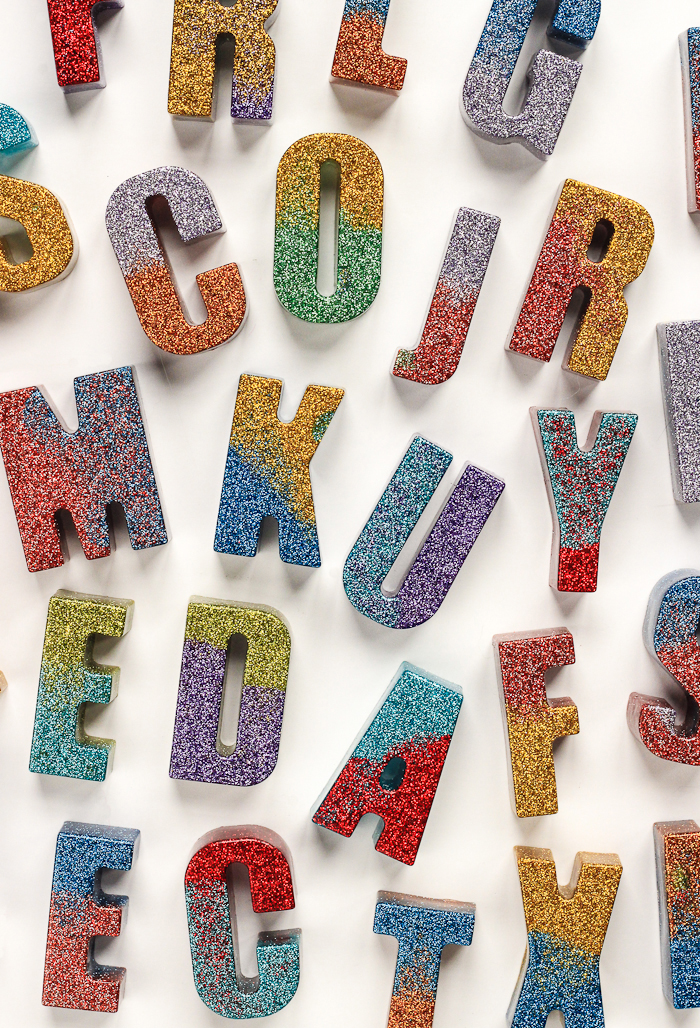
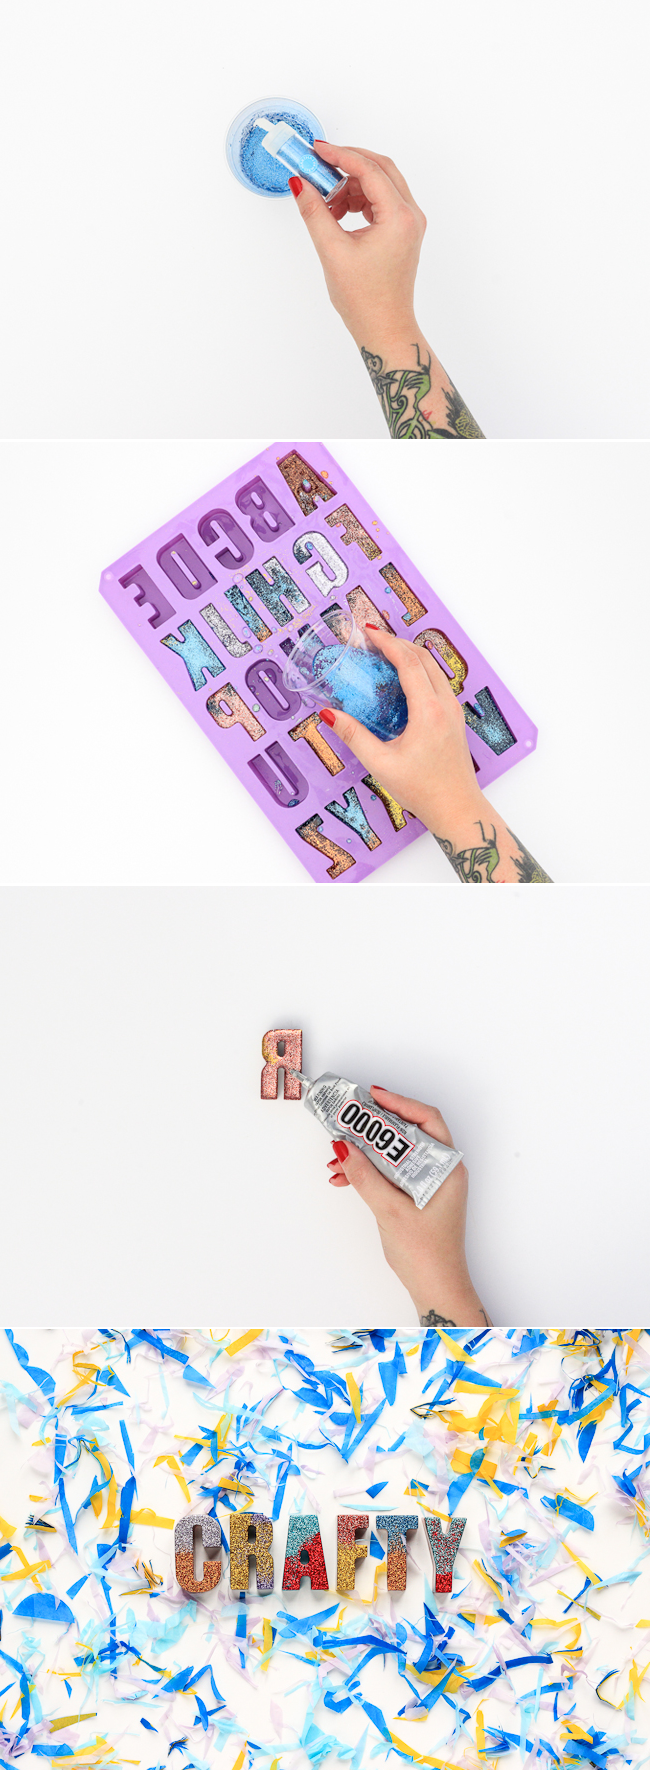
Mix your resin according to the instructions in your package. Pour clear resin in separate plastic cups (one cup per color) and then add about a quarter size amount glitter. It’s okay to add more as you mix until you get your desired look. I recommend making 3-5 colors at once to play with variety of combinations when color blocking, but it’s totally up to you.
To get the color blocked look, you’ll want to pour a bit of one color in slowly at one point. Before it coats the bottom of the letter, add your secod color. If you pour directly over the first color, the glitter tends to blend together. For the second color, make sure you start pouring from a different point.
Let dry overnight, pop out of mold, and glue a magnet on the back!
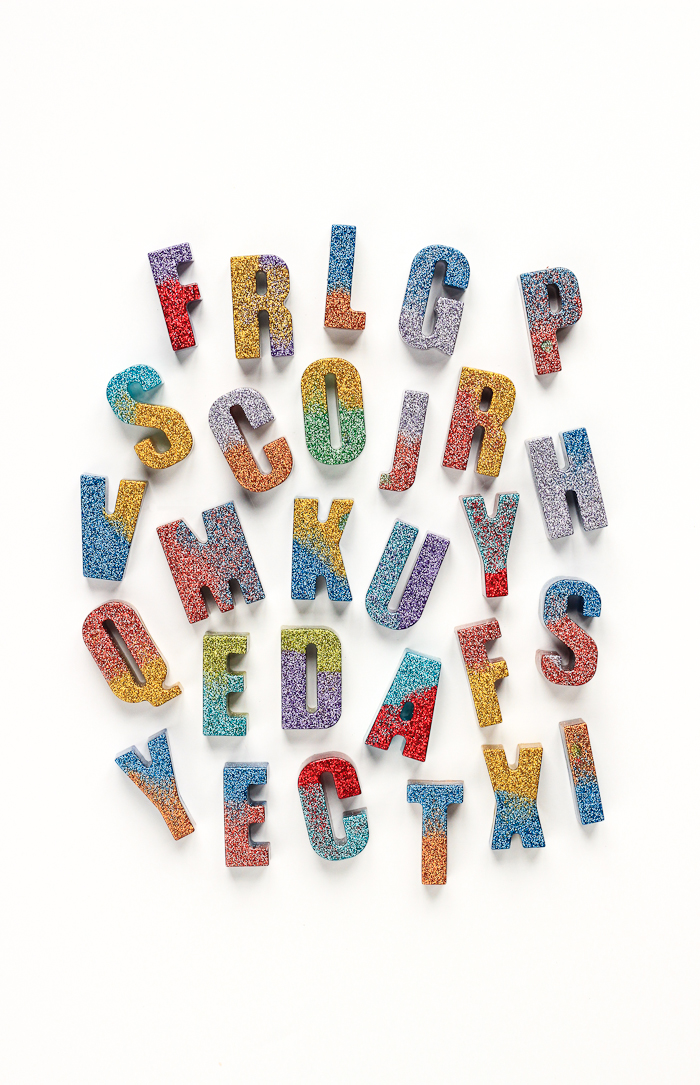
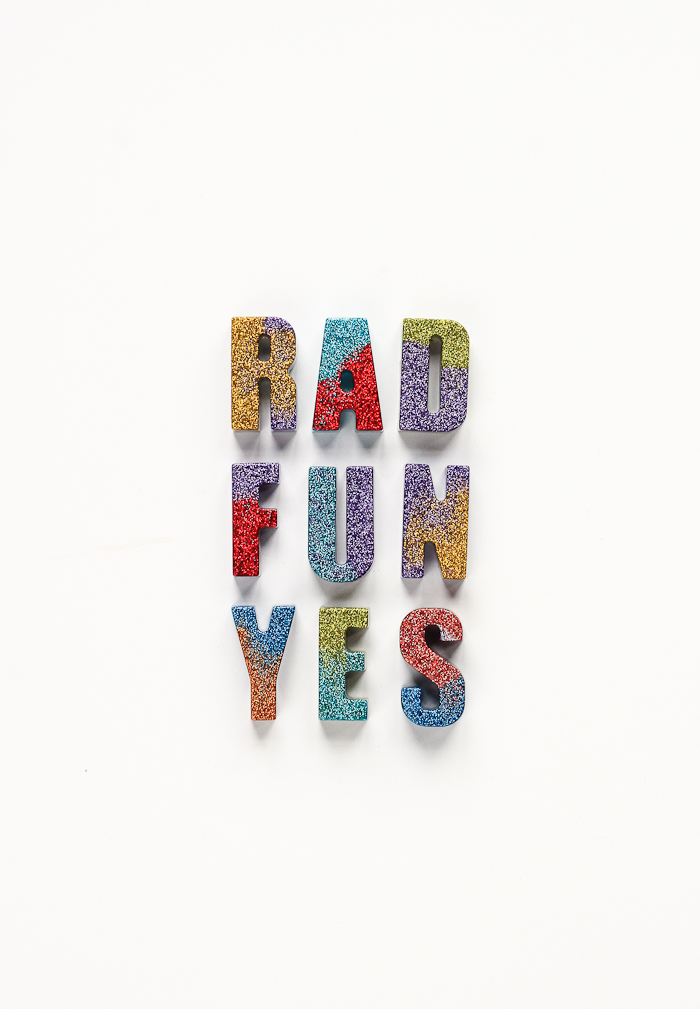 These are such a fun way to add some personality to your fridge, don’t you think?!